Thursday, October 29, 2015

Stretching Sangria WOTG and Twinkle Stamp Sets

As I said last week, one of the things I require from a Workshop of the Go set is that the stamps stretch to multiple uses.  Here are a couple Sangria WOTG cards that use different colors to create all-purpose types of cards.


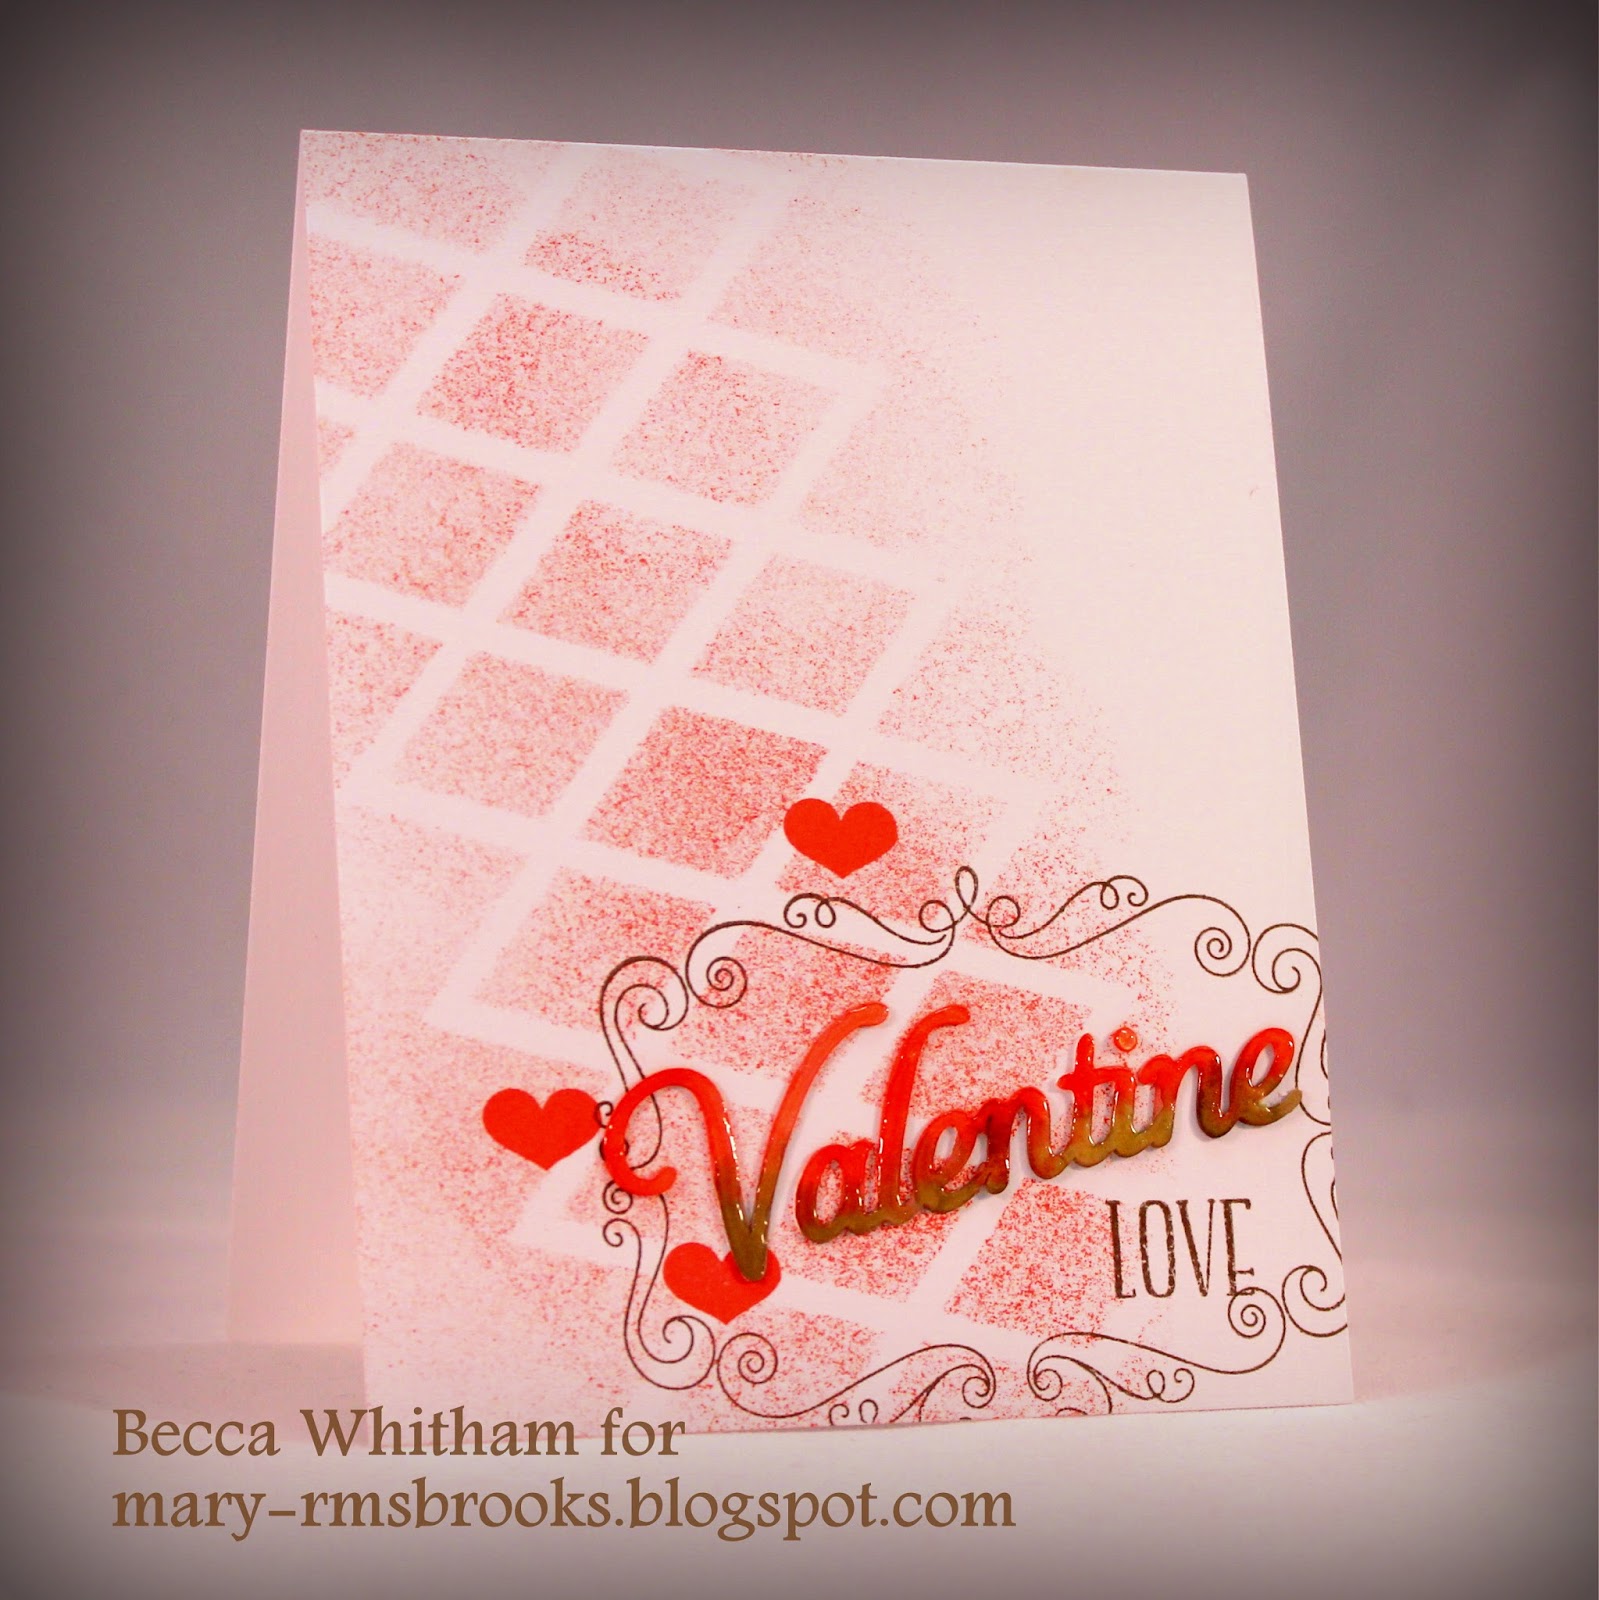
Here, I used the same Poppy color that comes in the Sangria WOTG but added Canary (paper), Honey, Cranberry, New England Ivy and Fern.  After finishing this card, I wished I had used the embossing folder that Mary Brooks is offering as part of her October Card Kit to add texture.  The sentiment comes from a stamp set called Holiday Tags.  Everyone needs a stamp set like this one, where there are a bunch of sentiments that cover a wide variety of occasions.


This card uses Pixie, Canary, Pear, Sunset, and Gypsy inks to coordinate with the small strip of Kaleidoscope paper for a Springtime feel.  PixieThick Twine finishes it off with a simple knot and frayed edges.  I love how the fraying gives the same "heft" as a bow but uses less material.

I also want to show you a fun card that stretches the October Stamp of the Month, "Twinkle," into a baby card.


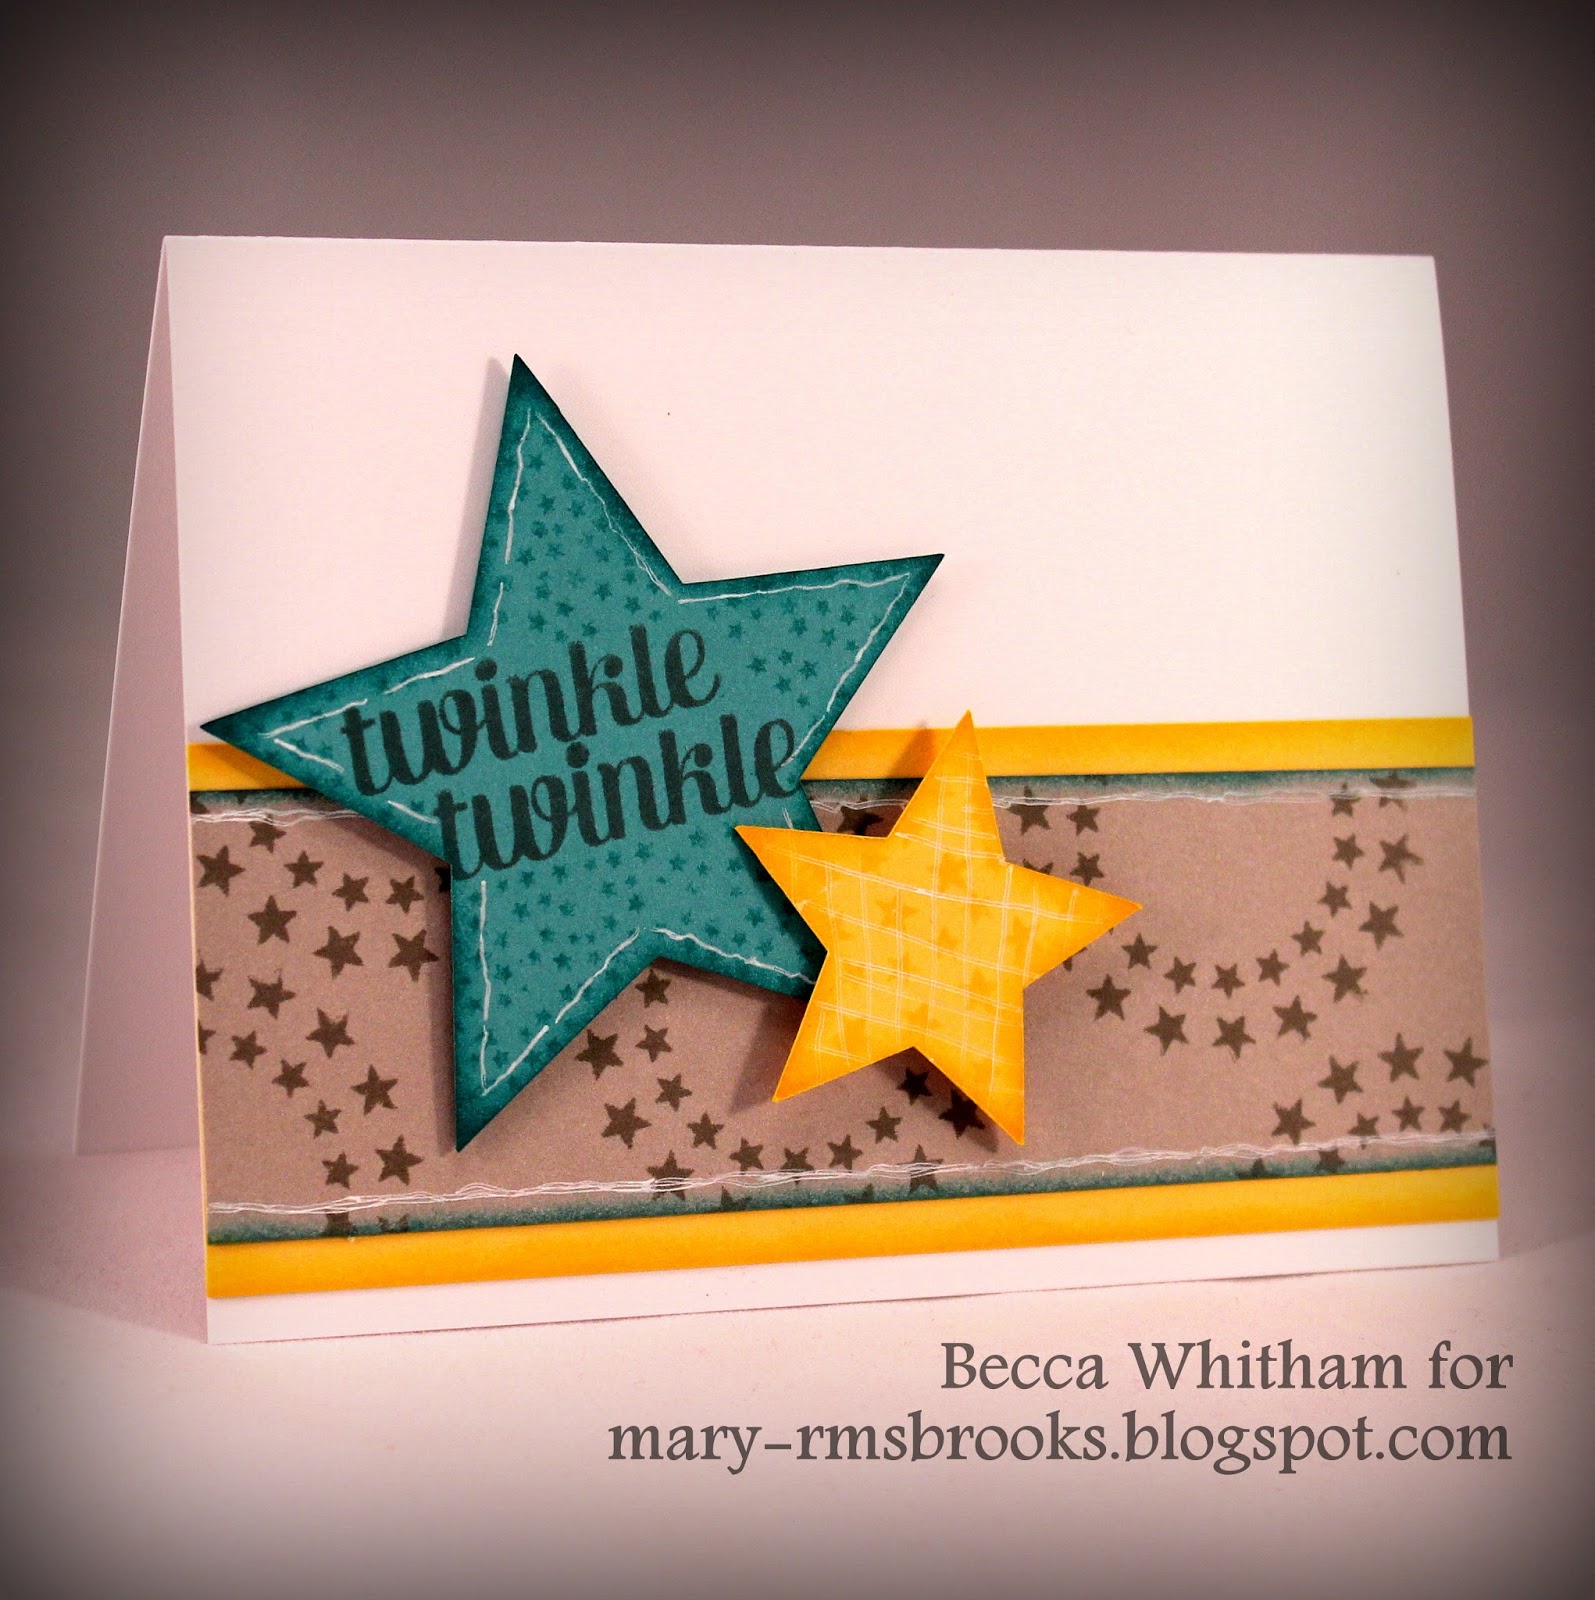
The colors are Canary, Lagoon, Whisper and Slate.  I cut the stars with the Artbooking Cricut Cartridge, but stars also come in Artiste and Art Philosophy.

The edges of every piece of paper are sponged with the coordinating ink color except I used Lagoon ink on the Whisper paper.

Twinkle, twinkle is stamped in Slate ink, then the small stars were stamped in Lagoon around it. The smaller star is Stamped with the same circle star stamp used on the Whisper paper stamped in the darker Slate gray.

I did use one non-CTMH supply...a white gel pen you can find in any local craft store.  The card could be done without it, but I think bordering adds a finished quality to the entire card.  I used the white gel pen on the first card as the centers of the small, red flowers. The red dots in the center of the Canary/Honey flowers were created by using the bottom end of a pen that had a pointy edge "stamped" in Cranberry ink and touched to the paper.

If you want the Twinkle stamp set, you need to act TODAY!! It goes away on Nov. 1, 2015.

Here's the supply list (with embedded links for your shopping convenience):
Stamps: Sangria WOTG, Holiday Tags, and Twinkle (October SOM which is $5 with the purchase of $50)
Ink: Cranberry, Honey, New England Ivy, FernPixie, Pear, Gypsy, Sunset, Canary, Lagoon, Slate
Paper: Poppy (comes in Sangria WOTG), Canary, Kaleidoscope, Lagoon, Whisper
Accessories: Micro-tip Scissors, Foam Tape, Sponge Daubers, Pixie Thick Twine, and a white gel pen

I'll be back next week with the White Pines Cardmaking WOTG.  I'm in love with this set, and it stretches into a wide variety of occasions.

Until next time,
Becca

Thursday, October 22, 2015

Sangria Cards with Artiste Cricut Cartridge

This week for design team duties over at Mary Brooks' blog, I'm adding the Artiste Cricut Cartridge to the Sangria WOTG. (I didn't use the October Stamp of the Month this week, but it will be back next week.)  I focused on Valentine card this week.

I used several tricks, so I'll be providing pictures to help illustrate what I did. 


This one is very straight-forward. I cut the two red hearts from Artiste, stamped the small Eggplant heart and Cocoa banner (trimmed down to just the part I wanted) from the Sangria WOTG, and layered it all together using glue and foam tape. The larger, folded Artiste cut heart has holes for threading a knot or bow, but they were too small for the twine.  I simply tied a knot, frayed the ends for added "heft," and adhered it between the holes with Liquid Glass. The flower tucked inside the biggest heart comes with the Sangria WOTG.

 
I'm absolutely in love with that scrollwork frame.  I'll be using it over and over and over again. This card uses a multitude of tricks, so let me break them down for you.  The first is using masking tape to customize a sentiment.  Let me give you some hard-earned advice:  Don't forget to take off the tape before you stamp!  If I'm going to use only one part of a sentiment repeatedly, I'll cut the stamp, but using tape like this works if you aren't brave enough to cut or want to keep the sentiment together for future use.  

"Valentine" was cut with the Artiste cartridge, as was the mask for the background pattern (see below).  I painted the sentiment with Coco and Poppy ink (I'll show you how in a moment), let it dry, affixed it to the card, and covered it with a layer of Liquid Glass.  Voila!  Instant puffy sticker in whatever color and quantity you want.
 
Here is the mask I cut out of a plastic notebook divider. The image is half the length of what's shown. I used Design Space (Cricut Craft Room works, too) to copy and paste the image, line it up so the ends overlap, then weld the images together. I love creating custom masks like this. The darker blue you see is what the mask looks like. I laid it over top of what I cut out so you could see both.  For the card, I sponged Poppy ink through the mask with a large, round sponge.


The final card uses the watercolor technique I used on this card, the "Valentine" sentiment above, and the leaves on the third card from my post two weeks ago.  Before I show you that, let's talk about the tag.  I sized the tag, stretched the width by "unlocking" the image and dragging the bottom down until I was happy, added the letters (from the Artiste alphabet) and "sliced" them into the tag. The "LOVE" was masked off just like I showed above and stamped in Poppy.
 
To watercolor with ink, squeeze the lid and ink pad together before opening. You'll have a blob of ink in the lid. Add a small bit of water for deeper color, more water for paler color, and paint with a brush.  I used a wide brush with Poppy and Eggplant ink for the background on this card. (The "Valentine" sentiment uses a fine-tip brush with Poppy and Cocoa; the leaves on the "Fall" card shown here were stamped on Sangria patterned paper in Cocoa then painted on one side only with watered down Eggplant ink to give the leaves a two-tone effect.)
 
Here's the supply list (with embedded links for your shopping convenience):
One of the things I require from a Workshop on the Go is that it needs to stretch beyond what the set indicates in order to work around the year.  I hope you'll come back next week for a few cards that go beyond.

Be sure to check out Mary's October Card Kit, too. It features the Sangria paper, either a stamp set or embossing folder of your choice, and gives you some lovely Fall cards.

Until next time,
Becca

Thursday, October 15, 2015

Cards made with Sangria and October Stamp of the Month

This week for design team duties over at Mary Brooks' blog, I am adding the CTMH October Stamp of the Month, "Twinkle," to my list of supplies.  Other than that, everything used is what you get in the Sangria Workshop on the Go plus the supplies used last week with the addition of Desert Sand ink.


This card adds the string from "Twinkle" as the flower stems.  Everything else comes from the "Sangria WOTG." To create individual leaves, I turned the outline image of the leaf over and stamped with the back side.  That's why the three Champagne colored leaves are larger than the Cocoa colored outline image.

 
For this card, I used the back side of the double circle of stars from "Twinkle" stamped in Champagne as my wreath base.  I stamped the top three leaves from leaf bunch of "Sangria WOTG" in Desert Sand and layered them over top of the wreath base.  Then I stamped the individual outline leaf in Cocoa over top of a few of the Desert Sand ones and a few more in other places.  I used the bunch of small stars from "Twinkle" stamped in Poppy as my holly berries.  I also sponged the edges of the Sangria paper in Poppy to give it an edge.  The sentiment comes from Twinkle and was stamped in Desert Sand first and sponged with a dauber in Poppy to get the multi-color look.  The Poppy Thick Twine was attached with Liquid Glass.
 
 
This card uses the light string, Christmas Love sentiment, and diagonal stripe ornament from "Twinkle," while only the hearts come from the "Sangria WOTG."  I stamped the string in Cocoa on the white panel first.  The larger heart was stamped in Poppy then "kissed" to the ornament stamped in Eggplant then stamped on the panel.  The smaller heart was stamped in Eggplant then covered with Liquid Glass.  The sentiment was stamped in Eggplant on a separate piece of white cardstock, cut out, and glued so only "Love" showed.
 
Here's the supply list (with embedded links for your shopping convenience):
    Next week, I'll be adding one of the CTMH Cricut Cartridges to the supply list.  Hope to see you then!

    Until next time,
    Becca

Thursday, October 8, 2015

Sangria Cards

My goodness, it's been a long time since I posted! But I've been busy behind the scenes with lots of design team duties for Close To My Heart Consultant Mary Brooks

As some of you may remember, I took a vow to forgo buying stamps and supplies for twelve months back in June--not a good idea when my favorite stamp company released their annual catalog in August. I wrote down two pages full of things I want. TWO PAGES!

Something had to be done.

What a thrill to connect with Mary.  She sent me three Workshop on the Go (WOTG) sets: Sangria (Scrapbooking), White Pines (Card Making), and Kaleidoscope (Card Making).  She also sent a few other goodies I'll be showing you in the next three months.  Every post will include a supply list with embedded shopping links at the end. 

This month I'm featuring the Sangria WOTG.  If you aren't familiar with this set, I encourage you to go here and see the stamp set before proceeding.  This kit is designed for scrapbooking, so my job is to show you some cards made with the same supplies.  Today's cards use only the supplies that come in the WOTG plus some coordinating ink colors, Foam Tape, the wonder-working Liquid Glass, and oh-so-necessary Sponge Daubers.


There are no coordinating Cricut cuts for what you see here.  I hand cut all of them. It's a little fussy, but so worth it. (And easily done while watching football or Chick Flicks.)  The edges of that gorgeous frame were sponged lightly with Eggplant Ink.  Notice the center in the larger of the two Eggplant flowers.  I used a pencil eraser to stamp the Poppy color.


This one is as straight-forward as you can get.  It's a little difficult to see, but the centers of the flowers have Liquid Glass dots added for sparkle and texture.  I also used Liquid Glass to adhere the flowers and Poppy Twine bow.  That duality is what makes Liquid Glass a must-have accessory!  I also notched the edges where my Poppy Twine wraps around the top panel.  I used a small hole punch, but you can also do this by snipping a small V-shaped notch.  I make notches because they hold the twine in place and keep the very clean, straight line of my top panel from bulging at the sides.


The first two cards didn't have a sentiment.  For this one, I created "fall" by masking off parts of the "family" stamp. To create the wreath, I started by drawing circle with a pencil. I stamped the long, thin leaf border in Cocoa--but only the top inch or so--then worked my way around the circle.  I stamped the larger leaves in Cocoa over top of the smidgen of paper left after I made the first two cards.  Notice that some of them are on the pattern and some appear to be two-toned.  I got that two-toned effect by "watercoloring" one side of the leaf with watered down ink.  (I'll be showing you how I did that in more detail later this month.)  Remember that Poppy colored center on the first card?  I stamped the flower in Eggplant, cut out the centers, and covered them with Liquid Glass to create the berries.  (Note: I've found it's better to adhere my berries to the card before adding the decorative Liquid Glass, or to stamp and cover the centers then let them dry for a long, long, long time before cutting them out.)  Finally, I used Sponge Daubers with Eggplant and Poppy ink to mimic the multi-color effect of the Sangria paper on the matte beneath my top panel.

Here's the supply list (with embedded links for your shopping convenience):
Next week, I'll be adding the October Stamp of the Month "Twinkle" to my supply list. 

Until next time,
Becca