Tuesday, August 29, 2017

It's RELEASE DAY


So excited to get this book in the hands of readers starting today. Squeal!

No author copies have arrived on my doorstep, though. Sigh.

Until next time,
Becca

Monday, August 28, 2017

Anything Goes CTMH Style

The new Seasonal Expressions catalog goes live September 1, and it is full of inspiration and beauty. A couple of my favorite things are the die cuts and "Happy Day Workshop Your Way Cardmaking Kit. I never purchase a kit unless I can use the stamp set multiple ways once the paper is used. Here's one possibility I made for this week's H2H Challenge: Anything Goes CTMH Style. Everything except the die cut is from the WYW.


The "Thankful for You" die cut comes as three separate pieces, so you have tremendous flexibility. Here I cut it from a panel of White Daisy cardstock and backed it with Charcoal cardstock.  I used this same set of dies on the cards in this post. You'll be seeing a lot of these dies over the next few months.

I colored the flower, leaves, and edge of the banner with Copic markers and then fussy cut them with my Micro-tip scissors. I used foam tape to mount the die cut panel to the card base, glued the banner and leaves over top, then used a little more foam tape to add the flower. So simple and easy!

I'll update this post with shopping links once the new products are live for purchase on September 1. (NOTE: now updated!) You won't want to miss the September National Stamping Month special, either. Go to this post for a sneak peek. And, if that weren't enough, the September Stamp of the Month is fab!

Okay...I'll quit gushing now...but, folks, these upcoming products are why I became a consultant. I simply couldn't wait to get them in my inky fingers.

Until next time,
Becca

Shopping Links:

Friday, August 25, 2017

End of Summer Blog Hop


I got on a scrapbooking kick a couple weeks ago and started putting together layouts with pictures that are almost twenty years old. One of them was about Camas Meadows Bible Camp in Leavenworth, WA which is a place near to our family. It IS summer to us.


I used the soon to retire Jack paper and CTMH Artbooking Cricut Cartridge (everything but "CAMP") and Artistry (for "CAMP" only) with coordinating Black, Ruby, Juniper, and White Daisy Cardstock. If you have Cricut Design Space and the Artbooking Cartridge, here's the cutting file. (NOTE: If you don't also have the Artistry cartridge, just delete "CAMP" before you cut...or buy the cartridge using the link below. **Big, cheezy grin**) Color My Heart's challenge this week is Jack, so I'm joining the fun there.

On the three polaroid framed pictures along the bottom right, I saved the arrows from each frame and refit them inside one of the others. And, yes, that is underwear hanging from the rafters in the middle picture.

This is probably the busiest layout I've ever done as far as background paper, but I tried a bunch of other papers besides that buffalo print and they just didn't work. Here are a few detail shots:


I used a white gel pen to accent a few of the cuts. As you can see, I wasn't worried about being super neat with my sketchy drawing. This is a camping layout, after all!

Remember, Jack retires in a week, so be sure to check out the shopping links below. Now you're off to your next stop along the hop: Katy. You should have come from Jayma's blog, but if you get lost somewhere along the way, you can always go to Amie's blog for a full list.  I got a sneak peek at some of the projects, and you don't want to miss a single one.

Until next time,
Becca

Shopping Links:

Thursday, August 24, 2017

Sweet Baby Card with Prickly Pear Paper

It seems like babies come in groups. We've had two friends deliver recently and another just found out she was pregnant. I got on a card making roll with the new Sweet Baby and Baby Animals stamp sets. Here's one of the cards I made:


I just adore that elephant. I stamped him in Heather pigment ink on Watercolor Paper, embossed with Clear Embossing Powder, and then painted with Watercolors in black and pink. After he was dry, I cut him and the balloon with the coordinating die cuts. To save paper, I cut my background panel using MFT's Blueprints 15 (retired), laid it over top of a 4.25 x 5.5 piece of Prickly Pear blue stripe paper, and drew a faint line where the panel would cover once the card was assembled. I then cut inside the pencil line and used that scrap to cut the balloon. I then ran my wonky panel through the new Alphabet Embossing Folder.

The pierced banner was die cut with MFT's Blueprints 20 (retired). I embossed "Welcome" from the Baby Animals stamp set using Heather pigment ink and Clear Embossing Powder. I stamped "Little One" (also from Baby Animals) as the inside sentiment also in Heather ink.

Once I put the card together, I spent a long time fussing with the placement of the balloon. It finally dawned on me that it needed an outline. Now, don't laugh, but my desk was such a mess by this point that I didn't notice there's a stamp in the Sweet Baby set that's an outline of the balloon. I hand-drew this one with a silver gel pen. It's okay, but it would have been better stamped in the same Heather color.

I love the "Sleep is Overrated" sentiment from the Baby Animals stamp set, but it didn't really fit as an inside sentiment. It did, however, work great to decorate the envelope flap. I used Glacier ink to coordinate with the Prickly Pear paper. This paper pack retires in a week, so I've also included a link to the new Whimsy Fundamental Paper Pack in the shopping links below. Whimsy includes soft blue and pink colors which would work just as well for a baby card.

The combination of Sweet Baby and Baby Animals is going to be my "go to" when it comes to welcoming babies into the world. They are my favorite baby-themed stamp sets CTMH has ever produced...and that's saying something!

One more note before I go: I don't know why it takes me so long to order some of the products CTMH has. I guess it's because I think I can get them cheaper by using coupons at a local store. However, the Acrylix Spritz Cleaner and Stamp Scrubber came in my consultant kit. I have struggled for years trying to get pigment ink off my stamps. That stuff gets into nooks and crannies and simply won't come off. I've had to resort to using Staz-On stamp cleaner and even then I still have residue. Um...people...the combination of Acrylix Spritz Cleaner and Stamp Scrubber works. REALLY works! Should have bought them years ago!

Until next time,
Becca

Shopping Links:

Monday, August 21, 2017

Army Wife Project with CTMH USA Cricut Cartridge

My friend and very first customer has given me permission to share with you a project she made yesterday using the new USA Cricut Cartridge. As an Army Wife, I'm always looking for new and interesting ways to catalog our various experiences. I love what April has done here:

Speaking of Army Wife stuff, I'm being interviewed at 8:30pm EST on Army Wives Network Radio tonight. We're giving away two copies of The Promise Bride set to release in eight days. I hope you'll join us after watching the eclipse today. Wasn't it nice of the army to move us to Columbia, SC just in time to be in the path of a full eclipse?

Until next time,
Becca

Sunday, August 20, 2017

USA Cricut Cartridge Hibiscus

As I've mentioned before, I love stretching stamps or cartridges beyond their obvious uses. I used the new CTMH USA Cricut Cartridge to create this card which meets Curtain Call's Hibiscus challenge:


If you have Cricut Design Space and the USA Cartridge, you can use this cutting file for the banner and flowers. The background stencil is the floral overlay of USA cut out of plastic. For the cardstock, I used the new dual sided Enchantment paper from CTMH plus Bashful, which is the color of the year. (Shopping links embedded and provided below.) As you can see from the picture, you actually get twenty colors, 2 of each sheet, in the combo pack.

I jazzed up the flowers and leaves with colored pencils and by sponging coordinating ink around the edges. The sentiment is from a promotional set that will be available next month. The smaller hibiscus is from Hawaii which I purposefully offset; the larger hibiscus is from Puerto Rico. I simply ungrouped the images and got rid of everything but the flowers and one banner then fiddled around with sizing until I was happy.

Here's another blog post using this same USA cartridge which also has cutting files. And here's a second blog post using the promotional stamp set that will be available next month.

In writing news, I'm being interviewed by Army Wives Network tomorrow at 8pm EST. If you aren't too busy watching the eclipse, I'd love to have you join us. We'll be giving away two copies of The Promise Bride which releases in nine days!

Until next time,
Becca

Shopping Links:

Saturday, August 19, 2017

From the Heart Teaser

Next month, Close to My Heart is running a special promotions called "From the Heart." People...this is the stamp set I've been waiting for! I could not wait to get it in my hot, little hands. Here's a look at one part of it.


No shopping links today since you can't get this yet, but I just had to share.

Until next time,
Becca

Friday, August 18, 2017

New CTMH Beautiful You and Country Collection Cricut Cartridges


I. LOVE. This. Stamp. Set!!

There. Just had to get that out of the way up front.

I also love the new Thin Cut "Thankful for You" which will be coming out on September 1. The words are separated giving you tremendous flexibility. I've made a number of cards using just the "Thankful," one of which is shown below.

However, what I really want to show you is the versatility of the new 
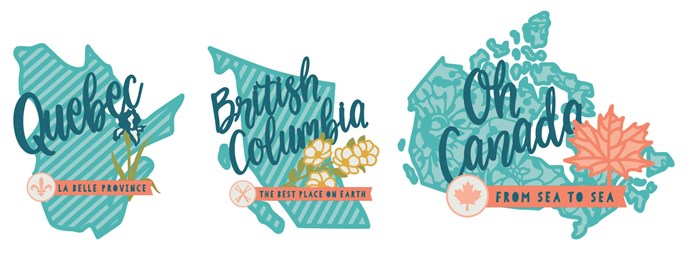
Country Collection Cricut Cartridges. Although more geared for scrapbooking, they can be stretched for card making. They are available for USA, Canada, and Australia/New Zealand. All of them feature states/provinces with both the floral and stripe overlay shown below.

I created a stencil by cutting Colorado out of a plastic notebook page separator. Both Colorado and Wyoming are basically a rectangle anyway, so all you have to do is insert the state into Design Space, ungroup the image and get rid of everything that isn't the stripe, stretch it big enough to cover a card front, and cut. The plastic notebook dividers I bought were so thin, I used the Cardstock setting on my Cricut dial and it cut perfectly. The only trick is to make sure your mat is sticky as plastic doesn't adhere quite as well as paper.

Once I had my stencil cut, I laid it over my card base and sponged Lemon ink over top. I cleaned off the stencil, flipped it over, and sponged Bashful. I concentrated most of the ink in the corner and faded out as it got higher on the card. The flowers were stamped using all three layers of images in the stamp set. For the largest flower, I started with Lemon for the base, then added the next two layers in Bashful and Pixie. The smaller flower was stamped in Bashful first, then Pixie stamped once for the middle layer and Pixie stamped three times for the top layer. The leaves were done in Sweet Leaf and Fern. To create the berries, I stamped the stem only from one of the leaf layers then used the tip of a pen to stamp the berries.

I cut the sentiment dies three times for each word and layered them together to get extra thickness. The sentiment banner was stamped in Fern and hand cut. This week CAS-ual Fridays and Addicted to CAS both have a "Friendship" challenge, so I've linked this card to their blogs.

Now here's another card I created by using the Slice and Weld feature on Design Space with the floral overlay shown on the USA image above:


If you have Cricut Design Space, click HERE for the cutting file.  I cut it at 4 x 5.25 and backed it with a piece of Bashful cardstock cut to the same size. I used the same "Thankful for You" Thin Cut set plus another stamp set coming September 1 for the banner. This time, I die cut once in Charcoal paper and once in White Daisy and layered them slightly offset. On this card, the Cricut cut does practically all the work!

Time for me to head upstairs and write. I'll be back with more cards using this digital only cartridge (list of compatible machines listed in the shopping link below). BTW, I'm going to be interviewed on Army Wives Network Monday, August 21, otherwise known as Eclipse Day. (We're in the direct path here in Columbia, SC, but the forecast is calling for cloud cover.) I'll be talking about The Promise Bride which releases in eleven more days. Yee!! The show starts at 8pm Eastern. Hope you can join us. We'll be giving away copies of the book.

Until next time,
Becca

Shopping Links:

Monday, August 14, 2017

H2H Sketch Challenge


My new consultant kit showed up, so despite my writing deadline (and that I've already taken several crafty breaks), I got inky. Ever since the sketch for this week's challenge was posted for the design team, this is the card I've seen in my head. I was tempted to change it when I saw a similar design from Alyson, but why not show two variations on the same sketch and same paper pack?


Once deadlines are over, I'm going to tackle learning how to make videos. In the meantime, I'm including some process pictures.

I started with a 4.25 x 5.5 piece of White Daisy Cardstock and used my paper trimmer to cut it at a diagonal. I wasn't worried about getting the corners exact because I knew I'd be cutting them off. 

Next, I cut a 2 x 6 piece of patterned paper from the new Adventure Fundamentals. Such gorgeous watercolor images in this pack!


Then I taped the white cardstock over the patterned paper in a spotlight rather than straight, laid a rectangular die cut from My Favorite Things over the top and ran it through my Cuttlebug.

What I should have done is put a piece of Washi tape over the top to keep everything together so I could turn it over for the next step.

Live and learn.
I had to refit the pieces inside the die to add these pieces of Washi so I could open up the top pieces for the next step.


After opening the white pieces like a door, I laid a 2x6 piece of Vellum Paper over the top, added tape runner over the inside of the white cardstock, and closed the door.

I might have been able to add the vellum into the original die cut, but I wasn't sure how many layers the die would take. Instead, I trimmed off the excess with Micro-tip Scissors.

Once I had the top panel done, I mounted it to a piece of Pacifica Cardstock using foam tape. I made sure to have plenty of tape along the seams where the patterned paper and white cardstock overlapped to keep everything secure. I left the Washi tape from the above picture in place, too.

I centered the panel on my card base and then added the sentiment which is from Short and Sweet stamped in Pacifica pigment ink and embossed with Clear Powder. I used another MFT die to cut the stitched circle.

To accent the sentiment and make it feel a little bigger, I added three White Enamel Dots.

I have about five more birthdays and an anniversary left in the month. I really need to get this story written. Wish me luck, I'm goin' in!

Until next time,
Becca

Shopping Links:
Short and Sweet Stamp Set
White Daisy Cardstock
Adventure Fundamental Paper
Pacifica Cardstock
Vellum Paper
Adventure Pigment Inks
Micro-tip Scissors
Black and White Enamel Dots
Clear Embossing Powder
MFT Stitched Circles
MFT Stitched Rectangles
Adhesive Runner
Craft Heater
Paper Trimmer


Saturday, August 12, 2017

Baseball Birthday Wishes with CTMH Artbooking and Graphically Speaking Cartridges

Second post for today because I got my son's birthday card done this morning and was so excited I had to share. He's a big baseball and Seattle Mariner's fan. There aren't any MLB images in the Cricut library, so I made my own.


Here's the cutting file for anyone who has Cricut Design Space. To use the cutting file, you'll need to own the CTMH Artbooking cartridge, but I don't know if you can buy the navigation image for $0.99 when you go to cut if you don't own Graphically Speaking. I used CTMH Enchantment Combo Paper Pack in Sapphire, Peacock (lighter side), and Ruby plus Heather from the Basics Combo Paper Pack paper. I've included both the combos and individual papers in the shopping links below.

The stitched edges around the top panel and banner were done with MFT dies. I love how it adds just a touch of interest without overwhelming. The stamped sentiment is from a retired CTMH set called Just a Number. I stamped it in coordinating Sapphire ink.

Now if this can just bring enough M's mojo to Safeco Field so the team strings together some wins, that will make my son's birthday complete.

Until next time,
Becca

Shopping Links:

CTMH Jack Gone Girly

I'm a big believer in finding ways to stretch your stamps to cover multiple occasions. I also love border stamps because of their versatility. For this card, I used the Buffalo Plaid border from "Jack-Scrapbooking" in Pixie ink plus the Flower Market Cartridge and a Zip-Strip from the Jack Paper Packet.


I'm not sure where I first saw leaves in colors other than green, but I'm a fan. Keeping the pink, grey, black and white color scheme gives this card a classy feel. To give the flower a little extra depth, I sponged Pixie ink in the centers and on the edges.

You might be wondering where I got that great big center button. Well, here's the thing...CTMH has packaged their stamp sets with a back snap for years. I saw where people were popping them off to create more room in their stamp storage. Um...BRILLIANT. As an added bonus, I can determine which stamp sets I'm using by popping off buttons as I pull them out. Anything with buttons left by August 2018 goes away. That's the plan anyway. Plus, they make great flower centers via the magic of Liquid Glass.

No sentiment on this because I need to build up my stash of any occasion cards. After a month-long move, I went through almost everything I had on hand.

For those of you who follow this blog, you're probably wondering how I can afford all this crafty time when I'm under another writing deadline. The answer is I can't. But I hate this story right now. It's okay. I hate every story at some point along the way. It usually means I don't have my character motivations right yet. So, while I talk to the current cast of characters residing inside my head, I craft. It's as much a part of my creative process as writing a synopsis or plotting.

Off to make one more card today. My son has a birthday in four days and I've yet to make his card. It needs to go out in today's mail if it has any hope of reaching him on the other side of the country before his big day.

Until next time,
Becca

Shopping List:

Friday, August 11, 2017

Hey! Hello, Jack!

My nephew is celebrating a birthday later this month. He's quite "on trend" with a full beard. I decided to use the Jack - Scrapbooking set along with coordinating Jack Paper to make this fun card to celebrate him.


I'm so glad Color My Heart is giving out their challenge colors in advance so I could make this a few days ago and link to them now. I used Copic markers to color his shirt: BG72-Ice Ocean (Juniper), BG75-Abyss Green (Peacock), and R39-Garnet (Pomegranate). Skin and hair are E50-Egg Shell, E11-Barely Beige, R01-Pinkish Vanilla, and E47-Dark Brown. (Links to the closest ShinHan markers available through CTMH included in the shopping list below. They are less expensive than Copics and do the same blending. I just bought Copics first.) After I had him colored, I added a little shading with some colored pencils. I'm no expert with alcohol ink markers, but I've taken a few classes and watch Sandy Allnock's videos a lot. That woman can make these markers stand on their heads and dance!

There are a few retired items on this card. The banner is a zip strip from Sugar Rush paper, "happy" comes from the Kaleidoscope Cardmaking Workshop from a few years ago, and "BIRTHDAY!" is from a set called It's Your Day which was a Stamp of the Month back in August 2009. I've decided that, even though I've signed up as a consultant, I'm not going to stop using non-CTMH or retired products. I love showing how CTMH plays well with others and giving new life to products that haven't seen use in a while. How perfect is that birthday font and the exclamation point with the zip-strip sentiments?

Jack retires at the end of this month. Get him while the gettin's good!!

Now to make my son's birthday card. Jack isn't going to work for my military son with short hair and no beard. Or maybe I'll make him jealous with what could be. Ha!

Until next time,
Becca

Shopping List:

Monday, August 7, 2017

Christmas in August

I need to get back to the writing cave and pound out about 2k more words before the end of the day, but I wanted to share another scrapbook layout I made this weekend. This one uses the Flower Market cartridge.


If you have Cricut Design Space, here's the cutting file.

As with yesterday's post, these pictures were taken on an old film camera.  Because the photos are dark, I chose a light background for contrast. Not all the papers are available now, so the shopping links are the closest comparable. I love how the single color Whimsy Fundamental background paper perfectly compliments the busy, colorful wreath and banner. To add a little depth, I sponged Nutmeg ink along the edges of the banner, flower, leaves, and pinecones plus the bottom of the sentiment. Love how the Cricut cuts did almost all the work for me.

Shopping Links:
I'm sure my poor son is hanging his head with embarrassment at this photo of his nose surgery recovery, but a memory is a memory. Isn't that why we scrapbook?

Lunch break is over. Back to work.

Until next time,
Becca

Sunday, August 6, 2017

Axing for Trouble with CTMH and Jack

Sometimes procrastination is serendipitous. For example, when a 2017 paper and stamp set from CTMH perfectly compliments photos which are about twenty years old.


Even though I'm missing one color for the challenge, I'm including my layout in this week's Color My Heart Challenge. I hope they don't mind, but I couldn't find a way to add Willow without having it jump off the page.

Again, these pictures are almost twenty years old. I'm not sure if digital cameras were around then, but I didn't have one. Yes, ladies and gentleman, these are pictures that were taken with actual film. I got to where I developed everything in 5x7 size figuring I could cut them down for scrapbooking.

I used four of the Picture My Life style papers because I needed to fill up space with interest despite only having two photos (and only because, as you see, my husband grabbed the boy child and forced him to face mom with her annoying camera) . The black axes on Slate background on the left is two pieces of PML paper with another PML paper cut into a circle over top to hide the seam. On the right, I stamped Jack over a PML piece, colored him with Copics, and then glued the "handsome" banner over top. I love that the bottom edge of that looks like beard hairs which have fallen off. Finally, the "Little Man" is a PML card cut down from the 6x4 size to 4x4. 

I should also note that the Sapphire B&T paper is two scraps glued to the top and bottom of the page with the focal picture glued over top. This was the last of my Sapphire B&T from the retired catalog, and I had to make it stretch. (I'm still waiting for my new paper to arrive, but I linked to the new because it also has a subtle pattern in Sapphire which would work to duplicate this.)

Shopping Links:
Jack - Scrapbooking stamp set (w/matching die cuts)
Jack - Scrapbooking stamp set
Jack Coordinating Cardstock (includes Ruby)
Enchantment Fundamental Paper
Sapphire Cardstock
Ruby Cardstock

Jack retires at the end of the month. I am sad to see him go, but I'll be pulling him out again when I find the photos of the log-rolling competition and others where my husband is sporting a full beard.

In writing news, I took the weekend off. Just needed a mental break. I did a bunch of scrapbooking...a bunch. I can't tell you how refreshing it was. Back to the grindstone come Monday, but at least I feel like I had a mini-vacation with my craft cabinet.

Until next time,
Becca

Saturday, August 5, 2017

New CTMH Cricut Collections

Would you like to see the complete set of images for the four--that's right, FOUR--brand new CTMH Cricut Collections? Every August, I've blog hopped to find the full set of images before I decide if I want to purchase. I thought I do the same for you.

 You Are Here
 

Hello USA
 Cricut Explore™, Cricut Explore Air™, and Cricut Explore Air™ 2.)


Hello Canada
Cricut Explore™, Cricut Explore Air™, and Cricut Explore Air™ 2.
 
 
Hello AU/NZ
Cricut Explore™, Cricut Explore Air™, and Cricut Explore Air™ 2.)
 
 
Here's a look at some artwork for "You Are Here."
 
 
My cartridge will be showing up soon, and I have a bunch of ideas to share with you. If I'm right about the Hello cartridges, all those images can be ungrouped and used individually. That's 50 state flowers in the Hello USA, 12 in Hello AU/NZ, and 14 in Hello Canada, plus flags and other distinctively national images. I'm not sure which box I'm more excited to get, my new CTMH goodies or my box of author copies for The Promise Bride.
 
Oh...who are we kidding? After five months in the writing cave, I'm ready to get CRAFTY!!
 
Until next time,
Becca


Thursday, August 3, 2017

Between Writing Deadlines

So...yesterday when I poked my head out of the writing cave after the big, fiery deadline was sent to the publisher, I decided to take the day off before plunging back into my third and final writing deadline for the year.  Because I don't have enough to do, I decided to sign up as a Close to My Heart (CTMH) consultant again. I've posted links to my new consultant website on the sidebar for now. I'm thinking about redesigning this blog and/or my author website.

And now back to my day job...

Until next time,
Becca

Wednesday, August 2, 2017

Yeee!

Just wanted to squeal about the brand new Facebook banner the publisher sent today.


My author copies should be arriving any day now. I actually ran out of the house to chase down the FedEx truck today because Google sends you to a house further down the street. I had to chase down our movers so I was giving the FedEx guy the same courtesy.

Only he wasn't looking for me.

Then the UPS guy slowed down and my heart rate picked up. But he wasn't coming to my house either.

I hate waiting.

Until next time (unless I get run over by a truck),
Becca