Welcome to the March/April 2021 New Products Blog Hop. You should have come from Michelle's blog, but don't worry if you started here. The hop is a circle, so just keep going until you get back where you started. If you get lost along the way, pop over to Melinda's blog where she has a full list of participants and links.
I fell in love with the Sweet Fruit stamp set as soon as I saw it. I kinda went a little crazy, so...yeah. Bear with me as I take you through my various creations.
The first two cards were created with just the images from Sweet Fruit. My first card pairs it with paper from the new Mix-Ins pack.
The lemon was stamped in Lemonade and Sundance. The cherries and the left apple were stamped with Peach as the solid base and overstamped with Candy Apple. The apple in the right was stamped with Lemonade as the base then overstamped with Candy Apple. The leaves are Fern with Toffee, and the cherry and apple stems are Toffee. I used the coordinating thin cuts to cut out the images, although I also used an exacto knife to cut a triangle between the cherry stems. And I think I stamped the apple stem the wrong way, but it worked well enough.
I white embossed the sentiment on Candy Apple paper that was cut using one of the dies from the Waterfall Thin Cut.
The white stitched border between the patterned paper and the card base was cut with the Stitched Rectangle Thin Cut. It's leftover from this next card.
Again, the stamped images are only from the Sweet Fruit set, but this time I paired it with the Floral Background Thin Cut. The base color is Sage, which is also the color of the sentiment. I used the Rectangular Stitched Frames, which cuts both a panel (which I used here) and a frame (which I used on the first card). The leaves on this card are Sage outline with a second generation stamping of Sage for the solid base.
For my third and fourth cards, I added fun sentiments from the You're My Jam stamp set.
Here I went very clean and simple. I cut a stitched rectangle background panel, backed it with a piece of Candy Apple cardstock a smidge larger, then glued both to my card base. I added the cherry and lemon images (same colors as the first card) and then stamped the sentiment in black...except I stamped it katywumpus, so I stamped it again on a piece of white cardstock and die cut it with the smallest square stitched thin cut. I love it when I can fix and oops by just covering it up!
Here's my fourth card:
I really love this card. It's my second favorite of this post. I die cut the lemon from Sundance Mix In paper and the leaves from Sage cardstock. The leaves are part of the die cut for the cherries, so I partially cut the image and trimmed off the excess so I only had a leaf left. I then repeated the process to get the second leaf. I sponged the edges in their coordinating ink colors then glued them to the stitched rectangle panel. I added a piece of black paper behind the stitched panel. I don't remember the exact measurements (and I'm away from home so I can't just grab a ruler and reach 2000 miles to figure it out), but my best guess is that it's 5.25x2.75. I finished by adding the sentiment in black in and a small gold bow, which means I can enter it in the current Heart2Heart Challenge: A Midas Touch.
Here's my favorite card of the bunch...
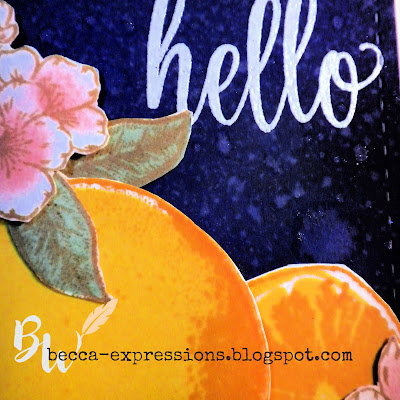
For this card I added the Cherry Blossom stamp set as well as some Distress Oxide Ink to create my background.
I started by sponging Chipped Sapphire over white cardstock. I left a few patches with a little less ink, then added Mowed Lawn and Seedless Preserves to those spots. I thin spritzed water to activate the distress ink. I also flicked some Clear Shimmer Brush over it before drying it and running it through the rectangular stitched thin cuts.Now you're off to Alyson's blog. I can't wait to see what she and the other talented CTMH Makers have created to inspire us!
Until next time,
Becca


