Friday, February 27, 2015

Happy Mail

My sister is fighting a pretty big health battle.  I wanted to send her a little something just to let her know I'm thinking of her.  I combined the color challenge from Color My Heart with Mojo Monday #386 for this card:


Here's the supply list, all CTMH:
  • Stamps: Jubilee Workshop on the Go (retired) and Happy Mail
  • Ink: Sunset, Honey, Olive, Outdoor Denim
  • Paper: Sunset, Olive, Outdoor Denim, and ProPlayer (retired)
  • Accessory: Resin flower from Pemberly Workshop on the Go (retired)
I only had a small scrap of the ProPlayer B&T paper left.  It was 2" wide.  I cut it into two strips, lined them up very carefully, supplemented the length with a 1" border of plain Outdoor Denim on top and bottom, and you would never know if I didn't tell you.

There was lots of fussy cutting on this card.  The flower was stamped three times in three different ink colors, then each layer was cut out and glued together to create the effect of a tri-colored image.

Since I liked the idea of securing the banner with the stitching along the left side, I had to do a little finagling.  I used a smidgeon of glue to secure the left side of the banner to the ProPlayer paper, sewed just that one side, slid the next layer under the banner, then foam mounted the main image over top.

I hope this brings a little cheer to my sister and reminds her that, though we are miles apart, we are always close.

Until next time,
Becca

Thursday, February 26, 2015

Cheating for a Good Reason

Sometimes I just get stuck.  It seems to be my theme lately.  But when you're on a design team or have a writing deadline, you can't afford to stay stuck for long.  This week I decided to cheat on my design team duties over at Stampin' Buds and steal an idea straight from last year's CTMH catalog cover.  Remember this?


I used it as my inspiration for this:


I am loving the Wanderful paper packet.  The colors are so fabulous together, even if I wasn't able to photograph them that well.  It's not a combination I would have tried otherwise, but it's very chic!

The blue background piece with the cut arrows, planes, clouds, etc. comes from p. 38 of the Artbooking cartridge.  I sized it to 6x6 before cutting.  I think everything is pretty self-explanatory, but leave a comment if you have questions and be sure to check back for an answer.

I did want to mention one thing about the paper pierced chevrons.  When I first poked them using the stitch guide, the holes weren't even.  That's because the paper piercing tool will poke with various degrees of pressure.  It won't matter if you plan to actually use the holes for stitching, but if you plan to leave them as is, you might want them to be uniform.  The way to get nice, even holes is to do a second round of poking where you lift the paper away from the piercing mat and poke the piercing tool about a full inch through the paper.  That takes the tool to the thickest width so all your holes are the same size.

Too bad I can't cheat by copying someone else's novella, but copyright laws tend to frown on that sort of thing.

Until next time,
Becca

Wednesday, February 25, 2015

Writer's World Wednesday - Perspective

As I told you last week, I have another contract.  It's exciting. It's wonderful.

It's somewhat terrifying!

I've known it was probably going to happen since last September, so I've been working on the story for a while.  I had a manuscript half done, thought it was good, gave it to a mentor who said, "This isn't working," and started all over again.  I got the first two chapters done by the first of February. Then nothing. I've been stuck for about three weeks now.  My deadline to turn in the manuscript isn't until June, but I'm already beginning to panic.  What if I can't get unstuck?

Considering my first novella (the one available in The Homestead Brides Collection right now) was 100% done before I had to start all over again with only six weeks to go, I was feeling pretty good at the beginning of the month.  Not so much anymore.

On Saturday, I went to a writer's meeting, told my dilemma to a New York Times bestselling author, who diagnosed my problem in one sentence.  My writing buddy and I looked at each other and said, "How come we didn't see that?" 

Perspective.

Sometimes you are so focused on the details you miss the overall objective.  A story gets written one word--one letter--at a time.  Keeping the big picture in mind as you work is vital. 

This week I'm taking the week to focus on the overall message of this upcoming story.  Let's hope it gets my brain in gear so my fingers can start typing those letters and words soon!

Until next time,
Becca

Thursday, February 19, 2015

Hide Countour

A few years ago I discovered a feature on Cricut called "Hide Contour."  It has changed my life!!  This week, for design team duties over at Stampin' Buds, I wanted to show you how it works.  I have a Cricut Explore, so I use Design Space.  Although my screen shots will be different, the Cricut Craft Room has the same feature if you have an Expressions or other machine that uses that online design service.

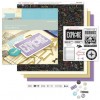
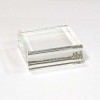
First, let me show you the card, then I'll show you how I did it.


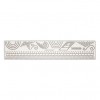
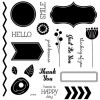
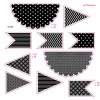
Don't you just love those zig-zag cut outs???  Here's how I did it.  Start by inserting the overlay from p. 44 in Artbooking.  For those of you who use the search feature, it's #M3CEB3.


Make sure the overlay image is "selected" before you right click on your mouse.  The drop-down list includes the "Hide Contour" option.  Click on it.  It will change the image to look like this:


Now you have to spend some time clicking everything you don't want to show up.  I started with the outside  rectangular cut and then added everything but three of the zig-zag lines.  The contours that you have eliminated from your cut will have a lighter blue line around them (which didn't photograph well enough to show you the difference).

When you are done, it will look something like this:


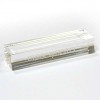
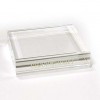
Before I cut, I lengthened the width and shortened the height so I got a 1"x 5" image.  I then positioned it on my mat between the 1" and 6" grid lines, clicked on "Select All" and then did another right click with my mouse.  The same drop down list appeared, but this time I selected "Attach".  This secures the image to the mat so, when you go to cut, it stays where you put it when you click "Go".  At least it's supposed to.  Cricut updated the Design Space software and there are still some bugs being worked out, but I was able to maneuver the image on the "Go" page.

I then laid my card on the mat so the bottom edge of the card front was at the 3/4" vertical mark, the top fold was at the 6 1/4" vertical mark, and the left edge was at the 1/4" horizontal mark before cutting.  Although this is a little time-consuming, it's not difficult.

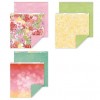
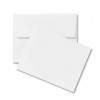
Here's a picture of the inside with the strip from the "Brushed" paper pack:


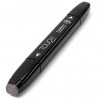
For those of you with a keen eye (and a memory long enough to remember what the card front looks like after this long), you'll note that there's a small ring of Canary in the center of the Pixie flowers.  Another trick I picked up a few years ago was using items I have on my desk to stamp with.  That little circle of Canary is from the bottom of a Sharpie marker.

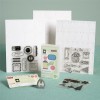
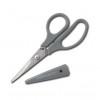
One last trick before I let you go...  To get the leaves to tuck beneath the flower images, I left myself room along their bottom edges when I stamped them on a separate sheet of white cardstock.  When I cut them out, I left about a 1/4" tail so I could glue that under the flowers.  The larger leaf image is designed to allow you to tuck it "behind" the flower image on a one-layer card, but I wanted the dimension of more actual layers of paper.

Please leave a comment if you've any questions and be sure to check back for an answer.

If you've never tried the "Hide Contour" feature on your design software for your Cricut, I highly recommend you check it out.  Combined with the "Weld" feature, the images on a single cartridge expand from "great" to "mind-blowing"!

Until next time,
Becca


Wednesday, February 18, 2015

Writer's World Wednesday - Like Playing the Violin

I teach violin.  This is a new thing for me.  I was a good player in jr. high and high school, took private lessons for about eight years, and considered applying to Julliard School of Music at one point.  Thirty years and about ten attempts to get rid of my violin later, I've picked it back up again and am teaching beginners.

BEGINNERS!!

However, a few of them have progressed to the point of needing to learn vibrato.  For those of you unfamiliar with stringed instruments, vibrato is that shaky hand movement that takes notes from flat, dead things to vibrant, shimmery music.

But it's a very strange thing to learn.  It takes a long time and lots of practice to force your hand to shake back and forth while staying in the same place. It's not something you attempt to teach until a student has the basics of bowing and fingering down.  Learning vibrato takes a lot of brain power, so anything that's not cemented as a good habit will fly out the window.  That can be extraordinarily frustrating to someone who's worked hard to keep their bowing straight and their fingering in tune.  All of a sudden, everything they've been working for is gone and things sound worse instead of better.

And it's the closest comparison I can make to what I'm experiencing now in my writing.

Character development is a real struggle for me.  There are some writing teachers who believe that you are either a plot-first writer or a character-first writer.  Me?  95% plot, 5% character.  So, even though I have a lot of the basics of writing down, I am relearning the entire craft putting my character's motivations first and foremost in my brain.

It takes a lot of brain power.  My writing speed is down to about three pages a day. There are days I want to chuck this whole writing thing and become a full-time...anything else.  But I can't do that because...

I HAVE ANOTHER CONTRACT!!!

I've been waiting for several weeks to announce, but wanted to wait until the ink was dry on the contract. I'm writing another novella for a Barbour 9-in-1 collection just like The Homestead Brides.  It's called The Cowboy's Bride and will release in March of 2016.

Thankfully, I have a fabulous crit group and a mentor who are overseeing my renovation to make sure the final manuscript is something you will want to read.

Until next time,
Becca


Thursday, February 12, 2015

Explore

A few days ago, I came across a layout while on Pinterest.  I decided to tweak it for design team duties over at Stampin' Buds.


Here's a link to the original pin.  I love, love, love how this turned out.  My photography is a little wonky, but the layout itself is straight.

I used several cuts from the Artbooking cartridge (coordinates with the Wanderful Workshop on the Go stamps) and two banners from Art Philosophy (one cut to coordinate with Bodacious Banners stamp).  The only cuts that might need a little more explanation are the blue arrows and airplane.  I cut the overlay from Artbooking p. 38 but sized it down to 6 inches tall.  There are plenty of leftover cuts which are now bagged and stored inside my Wanderful paper pack for future use.

Zip strips were used extensively on this layout.  When I first saw those strips, I thought they were a dumb idea.  Now I love them!  Yes, it takes me a while to warm up to new things.

All this layout needs now is for me to get photos from my trip to Paris last Spring developed and put in place!

Until next time,
Becca

Wednesday, February 11, 2015

Writer's World Wednesday - Blog Hop Giveaway


It's giveaway time!!

The nine authors of The Homestead Brides Collection got together to create a gift basket for one lucky reader.  We each contributed something representative of our story.  For example, apfelstudel plays a big role in my story, so I contributed an apple strudel scented candle.  (I almost bought one for myself while I was at it!)

We are also telling you a little about the background of our story.  Mine takes place about a year after the first Oklahoma Land Rush.  Being a native of Washington State, I didn't realize there was more than one. Turns out there were quite a number of them until the government figured out it was a really stupid way to settle land.  They went to lotteries instead of rushes for the last of the land openings, but that's another story.

One of the fun tidbits I discovered in my research was the origin of the nicknames "Boomers" and "Sooners."  But before I can explain them, I should set a little historical context.  After the Civil War, there was a great migration of people to the West.  They wanted to settle land that Native Americans lived on or traveled through.  The end result was war and a massive resettling of Native Americans to the Oklahoma Territory.  (If you would like to read about this period, I highly recommend Empire of the Summer Moon by S. C. Gwynne which was a finalist for the Pulitzer Prize.)  The government set aside large tracts of land and assigned various tribes to specific tracts.  After all the tribes were resettled, there was land left over called the "Unassigned Lands."  People soon wanted to settle it themselves, but the government wasn't allowing anyone on it.  A group of people decided to take matters into their own hands and begin homesteading illegally.  They planted crops, raised livestock, and tended to build sod houses or dugouts.  Their goal was to force the government to open up the Unassigned Lands and, hopefully, to be granted "their land" under the homesteading laws already in effect in other parts of the country.  They called themselves "Boomers."

Once the government decided to open up the Unassigned Lands for settlement, they didn't want to reward the folks who'd done things illegally, so they sent the army in to clear out all the Boomers in preparation for the great race for land.  The army met with varying degrees of success.  Most of these Boomers managed to be where the army wasn't long enough to avoid being rounded up and moved off the land they'd worked so hard to cultivate.

One of the crazy things about the first land rush was that the government issued the decree that the land would be opened in March of 1889, and the land rush itself was about a month later.  No one was supposed to cross into the Oklahoma Territory until noon on April 22, 1889.  "Sooners" are basically those who got into Oklahoma and staked a claim sometime after the announcement that the land was being opened up but prior to when it was reasonable that they could have left the Kansas/Oklahoma line before the gun went off at noon the day of the race.  Many of these Sooners were in Oklahoma, and particularly the city of Guthrie, legally.  There was a train depot there so anyone one with any legitimate reason to be in Guthrie on the day of the race, got there early and, precisely at noon, staked their claim to either a 160 acre plot of land or a city lot.  By the time the fastest riders reached Guthrie, most of the land inside the city limits and the surrounding homestead plots were already taken by either these Sooners or Boomers who had avoided the army. 

Estimates at the time were only one-tenth of people who raced legally claimed land.  By the time the dust--and all the lawsuits--settled, the estimates are closer to one-fourth.

I have a Pinterest board dedicated to my story in this collection if you'd like to see the characters, clothing, and homesteading pictures that inspired me.  And here's a link to an eye-witness account of the land rush of 1889.

But if what you really want is a chance to win, go HERE!

If you are interested in reading what the other authors wrote about their stories, here are the links:

Feb. 2. Darlene Franklin here on  http://coffeecupsandcamisoles.blogspot.com/
Feb. 3. Mary Connealy -  http://www.mconnealy.blogspot.com
Feb. 4. Erica Vetsch - http://coffeecupsandcamisoles.blogspot.com/
Feb. 5. Pam Hillman - http://pamhillman.com/blog
Feb. 6. Ruth Logan Herne - http://ruthloganherne.com/blog.html
Feb. 9. Carla Olson Gade  ~ http://carlaolsongade.com
Feb. 10. Kathleen Y'Barbo Turner at http://coffeecupsandcamisoles.blogspot.com/
Feb. 11. Becca Whitham - http://becca-expressions.blogspot.com/ (You are HERE!)
Feb. 12. Diann Mills - http://coffeecupsandcamisoles.blogspot.com/
Feb. 13. - Erica Vetsch at http://coffeecupsandcamisoles.blogspot.com/with the Rafflecopter entry Form. Entries will close at midnight, Feb 13th! Winner will be announced at this blog on Monday, February 16th, 2015!

I hope you win!!

Until next time,
Becca

Thursday, February 5, 2015

You Mean the World to Me

Masculine Valentine's Day cards...aaaaaah!  Cards for men are hard enough for me; throw in a holiday replete with flowers, lace, chocolate, and all things mushy, and I'm at a loss. 

But then came inspiration in the saying "You Mean the World to Me" from the stamp set by the same name, the globe from the set "Here We Go," and the "Wanderful Workshop on the Go" sent to me by the lovely Shannon from Stampin' Buds for design team duties.


I have long been in love with the off-kilter top panel look.  There's something fun and chic about it.  But, if you decide to copy this, may I give you a hard-earned piece of advice?  Cut your top panel, lay it on your card base, and then line it up on a craft mat or something where you can measure the exact center and draw a light pencil line from top to bottom so you can line up the globe base (stamped in Slate ink).
 
The globe was stamped on a separate piece of white cardstock in Flaxen the sponged with Crystal Blue ink.  You could get the same effect by creating a mask, but I figured it was easier to do a separate piece for the sake of lining it up.  I stamped the dotted line arrow after the globe was glued.
 
Here's the inside:
 
 
I don't always decorate the inside of a card, but this one was just calling for it...probably because I couldn't figure out a way to add the sentiment on the front without taking away from the off-kilter top panel which I'd already cut.  And (shhh, don't tell anyone) a decorated inside takes up lots of space and saves you from having to write much of a personal note.
 
Not that I don't have lots to say about how much I love my hubby, but it never fits on the inside of a card anyway.
 
Masculine Valentine. Check! Now I just have to figure out how to get through the holiday without falling off the Weight Watcher's bandwagon.
 
Until next time,
Becca