Saturday, December 15, 2018

Congratulations Card

A dear friend and fellow author just reached a huge milestone in her career. To help her celebrate, I made her a card combining products from three different companies.


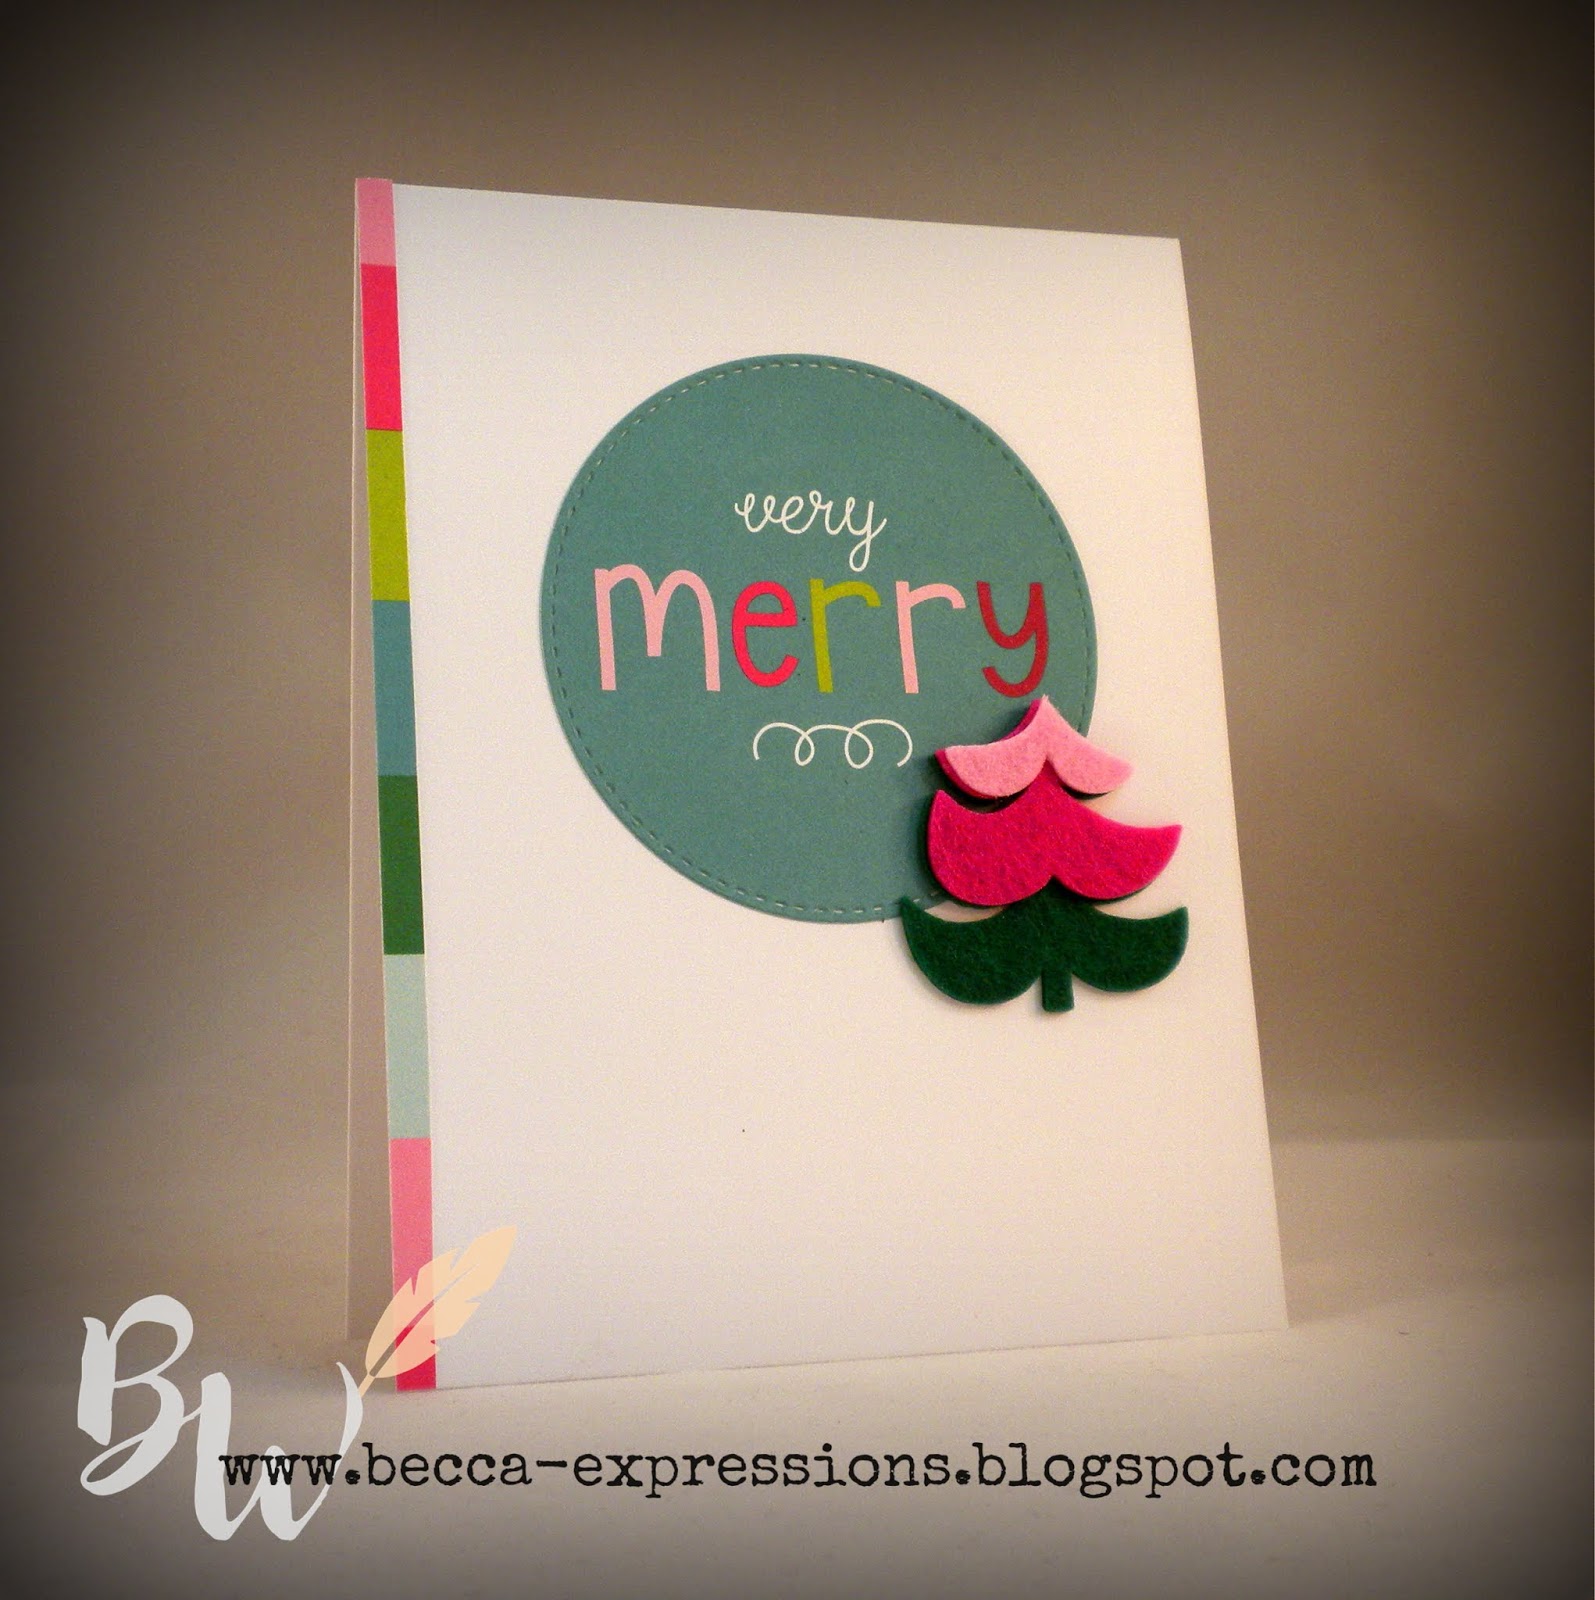
That gorgeous flower is a multi-layer die cut from Altenew, the sentiment is from MFT, and the scallop edge border and all paper is from CTMH. I think I'm going to recreate this exact same card but reverse the patterned paper, making the flower the plaid and the border the dotted pattern.

Since meeting my deadline back in November, I've been catching up on life and spending hours in my craft room to recover. I've been reading a couple of really interesting books to spark ideas for a novella collection. Hopefully I'll have news to share on that front soon...which means in the next six months because publishers have a different definition of the word than the rest of us do.

I'll be heading up to New York early next week to celebrate Christmas with our son. I hope to do a "Best of 2018" post either while I'm there or soon after I get back. I love this crafty, blogging, creative world I get to share with you. I've said it before (and I will probably keep saying it multiple times in the future), paper crafting is as much a part of my writing process as plotting and developing a character arc. I really, really missed being in my craft room while on deadline. It's been good to do nothing but make cards and scrapbook pages (which I don't show because I can't get good pictures) for a long time. My fingers are getting itchy to type a new story now.

Thank you for being part of my "tribe" by supporting both my papercrafting and my writing with your visits and comments.

Wishing you a very Merry Christmas and a wonderful New Year,
Becca

Friday, December 7, 2018

Final Ugly Sweater Card

All 72 Christmas cards went in the mail yesterday. Whew! I wanted to show you the final card I made to finish.


This combines two stamp sets from CTMH (see below for shopping links), retired and current paper from CTMH, two die cuts from MFT, and a Cricut cut.

So here's the deal...the Ugly Sweater stamp set comes with "Fa la la!" but I'm a singer and the full thing is "Fa la la la la la la." I know. I'm a little obsessive compulsive. However, I got an unexpected royalty check for the large print edition of The Promise Bride which needed to be spent and MFT had just released this adorable die.

To get the texture on the sweater, I used a background stamp included in the Flower Market Cricut Cartridge (CTMH exclusive). I'm not sure where the actual sweater cut comes from only that I fussed with altering the image because that obsessive compulsive part of me didn't like that the image came with the red part on top of the ribbing bands. I changed it so the sweater was the full image and the ribbing parts were separate cuts. I used retired Cranberry paper and current Linen paper (light side) and stamped with retired Cranberry ink and Black ink to decorate it.

Here are the shopping links for the current supplies available through CTMH:


That royalty check was large enough to purchase some other supplies, so here's my second card for the day...


I've coveted the Peony flower from Altenew for quite a while and then they went and released a plaid cover die. Oh yeah...put that in my cart right away! The sentiment is a mix of MFT (praying) and retired CTMH (for you).

In writing news, I took a long break after sending off the final book of the Montana Brides series but now it's time to get back to work on proposals for new stories. The rest of my royalty check went toward a couple of research books so I'm off to read.

Until next time,
Becca

Monday, November 26, 2018

Christmas "Pawlidays"

Now...before we even begin today's post, you need to understand that I am not a dog person. I'm not a cat person either. I'm a "I don't really want any pets in my home because I can't even keep a plant alive" person. However, when I saw the adorable "Happy Pawlidays" stamp set from MFT, I couldn't resist. For this first card, I paired the stamp set with the CTMH Fancy Tags Thin Cuts and some Oh What Fun paper. I also used a snowflake embossing folder.


For this second card, I used retired paper and a retired snowflake thin cut from CTMH as well as the current Fancy Tag Thin Cuts


Both images were colored with Copic Markers. Soooo stinkin' CUTE!!

Before you go, please enter to with the $150 Amazon Gift Card by following me and five other Inspirational Historical Romance authors. This drawing ends soon! And be sure to link through to my CTMH website for Cyber Monday Deals!!

Until next time,
Becca

Sunday, November 25, 2018

Oh What Fun Christmas Cards with Felt Compliments

As promised in yesterday's post, here are the other six cards I created using the Oh What Fun Paper Packet and Felt Compliments.


I seriously had loads of fun using these compliments, particularly in conjunction with the Ugly Sweater stamp set. For the ribbing on the sweaters, I just used a white gel pen. The only retired product was used on the first card. I don't know about you, but I have a ton of Christmas stamp sets so I limited my purchases to just the Ugly Sweater set this year in favor of using the products I already have.

Again, please be sure to enter the drawing for the $150 Amazon Gift Card by following me and five other authors on BookBub. The contest closes in 2 days!

Until next time,
Becca

Saturday, November 24, 2018

Christmas Cards with Tags

Whew! Thanksgiving company has left, the house is clean, and I could get back into my office to photograph some of the cards I've been working on for the past two weeks. If you've visited my blog at any time since CTMH came out with their new Fancy Tag Thin Cuts, you know that I love tags on cards. LOVE them. Today's post has two examples of double tag ideas.

This first one uses colors from the current Color My Heart challenge: Kraft, New England Ivy, and Candy Apple.


I saw this bent tree idea on a blog hop and neglected to copy down the information of who came up with it. Whoever it was...you're a genius! Except for the sentiment, everything on this card uses the current Stamp of the Month: Seasonal Trees (see sidebar for shopping link) which is only $5 with a $50 purchase. The sentiment comes from one of the Flower Market cartridge coordinating stamp sets. Isn't that perfect???

The stripe of red and white paper comes from the 'Tis the Season paper pack. I did a partial die cut with both it and the New England Ivy cardstock to create the tag top, layering them together afterwards. I cut a little too much of the New England Ivy so I just tore off the edge taking advantage of the white core of the cardstock. The piece I had leftover fit perfectly on the bottom, the white core adding another layer of interest. I trimmed the corners with Micro-tip Scissors.

This second card uses the Oh What Fun paper and Felt Compliments. Soooo cute!


The sentiment comes from a stamp set I purchased last year. I'll be featuring more cards using this paper and felt compliments in the next few days, so I hope you'll come back to see them. I made a total of seven cards and am seriously thinking about purchasing several more of the felt compliments because they are so stinkin' cute!

Before you go, please be sure to enter the Amazon Gift Card give away at the top of this blog post (through 11/27/18).

Until next time,
Becca


Friday, November 9, 2018

Ugly Sweater

I'm DONE!! Book three of the Montana Brides series is in the hands of the publisher...and I already know one problem. Fortunately, this is the first round of the process so I'll have time to fix it before it arrives in stores next year. The even better news is that I had a bit of time to play in my craft room last night with my favorite Christmas stamp set of the CTMH catalog: Ugly Sweater.


I used older papers and an old snowflake die cut on these, but sometimes it's good to pull out the old and combine it with the new. Both of these cards could easily be replicated with any paper you have on hand. (NOTE: I usually provide links to all the products used, but today I'm giving you just the link to the stamp set. Also available are the die cut for the tag and diagonal border on the top card.)

The top card shows you the stamped image of the sweater. The bottom one I stamped the image on the back side of the paper and cut it out. On the top one, I stamped the decorative part of the sweater in Whisper (retired but coordinates with the paper colors) then added color over the top with a red colored pencil and a black micron pen. On the bottom, I used gold a white gel pens to accent the decorative elements and to draw the bands on the cuffs, collar, and waist of the bottom sweater.

Someone please tell me I'm not the only one who still has paper from six years ago. Please.

The bottom card is for an exchange. I made twenty of these last night while watching mindless TV with my hubs. While I've been on deadline, he's been watching a show which holds no interest for me. However, when he's been an absolute prince to do grocery shopping, make dinner, wash dishes, and do laundry while I spent twelve hours a day in my office to get this story done, you watch what the man wants to watch.

We're off to a marriage retreat this weekend. No rest for the weary. And then it's time to start preparations for Thanksgiving. How did that happen?? Oh...right...the world didn't stop while I was buried in my writing cave.

Until next time,
Becca

Tuesday, October 30, 2018

October Stamp of the Month - Thanks & Giving

Can I give you a small piece of advice? Never try to promote one book when you're on deadline to write another. This is particularly bad when CTMH releases your favorite Stamp of the Month at the same time and you don't have nearly enough time to play. Ugh!

But my eyeballs were bleeding from too much screen time, so I sat down at my craft table and got inky. That was about two weeks ago. I took pictures of the card but didn't have the SD card in my camera.

Yes, it's been that kind of month.

I only have a few minutes now because this book is due in two days and I have about 150 pages left to revise. Yeah. Gotta get cracking. So...here's the card:


I don't have time to provide all the shopping links, but here's the supply list:

  • Grateful Heart Paper Pack
  • October SOM-Thanks&Giving (link on sidebar)
  • Espresso Ink
  • Ruby Ink
  • Goldrush Ink
  • Saffron Ink
  • Versamark Ink
  • White Embossing Powder
  • Markers (to color house and small flowers and add flower centers)
  • New England Ivy Cardstock
  • Ruby Cardstock
  • White Daisy Cardstock
  • Border Die Cuts (Line of flowers bordering the top of the Grateful Heart patterned paper)
  • Tag Die Cuts
  • Fern Thick Twine (Available in the Clearance section)
  • Micro-tip scisors
  • Glue

Okay...off to the writing cave. If you don't see me for another week, send chocolate.

Until next time,
Becca

Monday, October 22, 2018

FLASH SALE

Hey all...poking my head out of the writing cave to let you know about a FLASH SALE on one of my novellas. It's called The Gift of the Matchmaker, and it's on sale for $0.99 for a limited time. This is the first of two connected stories, so if you're curious about the maid, Rosalie, you can read her story: Cinderella's Masquerade.

Both of these stories come in Christmas themed collections. The first is "Merry Matchmakers" and the second is in "A Christmas Masquerade." The collections have many novellas by multiple authors and sell for $2.99. The individual novellas normally sell for $2.99 per story, so the collection is a great deal.

And now it's back to the writing cave so I can meet my Nov. 1 deadline. I promise, when this is done, I will back to crafting like a crazy woman because my fingers are ITCHING to get inky.

Until next time,
Becca

Tuesday, October 2, 2018

Second Bunches of Love with Thanks & Giving Stamp of the Month

Like yesterday's post, I combined Bunches of Love with the October Stamp of the Month: Thanks & Giving. This time, I used only the filler stamps from Bunches of Love for my floral image.


I've included the image of the Bunches of Love set so you can visualize my process as I explain it.

I stamped the largest flower twice, first in Ballerina then slightly offset in Peach. The centers are the smaller, symmetrical flower (top third, far right) in Smoothie with just one of the trio of dots (directly under "hello") inked in Pomegranate for the very center. The leaves were stamped in Sage.  The splatters were stamped in Linen which is my new favorite color. It took me a long time to order it because it's so light. I thought it wouldn't show up well. Boy, was I wrong.

The sentiment comes from Thanks & Giving and was stamped in Pomegranate.

Peach, Ballerina, and Sage are new inks introduced in the Holiday Expressions catalog that released last month. I'm loving all these soft colors. See yesterday's card featuring Sage, Lilac, and Carolina.

The lace border along the bottom was created using the only non-CTMH product. It comes from Altenew. I could have used the new Decorative Border Thin Cuts from CTMH, but I really liked the delicacy of that lace over the soft Ballerina pattern from the Boutique paper suite.

Here's the supply list (with links for your shopping convenience):


And now it's time for me to get back to my day job. I've written myself into a corner - which was on purpose - but now I have to figure out how to get out of it. Oy!

Until next time,
Becca

Monday, October 1, 2018

Bunches of Love with Thanks & Giving Stamp of the Month

I've made no secret of my love for the new Bunches of Love set. For this card, I've paired it with a single sentiment from the October Stamp of the Month: Thanks & Giving.


I started by cutting a piece of vellum paper at 4.25 x 11 inches and folding in half along the top. I stamped the outline image of the flowers in Versamark ink along the top fold and embossed it with white powder. I then turned the vellum over and stamped the filler images. I used a sponge dauber to create the shaded background behind the sentiment. To keep the filler images from stamping on the back inside, I used a scratch piece of paper as a mask along the center fold line. After the vellum was dry (which takes a while), I secured it to the cardbase by running a line of glue on the back, inside of the vellum. In other words, the glue is behind the stamped part of the vellum with the cardbase between. I hope that makes sense.

Here's the list of supplies (with links included for your shopping convenience):
White embossing over vellum is so classy. It's one of my favorite techniques. Oh...and for those of you who are wondering, I got my word count in. Just one more month to go before my deadline at which point I intend to celebrate by taking a very deep breath and spending a significant portion of my day crafting.

Until next time,
Becca

Saturday, September 29, 2018

Old-school Text

My birthday is coming up in a little over a week. I'm getting to the age where technology is moving faster than my brain can keep up. It seems like there's some new App or gadget every day. That's why the Old-school Text stamp set in the new Holiday Expressions catalog was a must have. I combined it with this week's Color My Heart Tic-Tac-Toe challenge to create this card:


I chose the colors along the top row of the challenge: Sugarplum, Linen, and Saffron. I used Charcoal as my neutral. It might be a little difficult to see the Linen. It's shading "old-school" using the rectangular swoosh from the Colorful Texture stamp set. For the pencil border, I stamped the outline first then filled in with the color block stamps in Saffron and Sugarplum. I used my MISTI to stamp the sentiment in Charcoal because I knew it would need to be stamped twice in the exact same spot to get that deep, full coverage over the pencil border. 

To finish off, I carefully lined up the notebook paper border die from Decorative Border Thin Cuts so the cutting edge and top of the die lined up with the left side and top of my card. You could just as easily line it up with the right side of a card that folds on the left, but I do top folding cards because they photograph better.

Here's the supply list (with links for your shopping convenience):
There's another reason I made this card today. It took me a very long time yesterday to get my word count in on my latest novel. Whenever my writing brain gets sluggish, I take time to do something with my crafty brain. It tends to loosen up the writing brain by forcing it to still think creatively but in an entirely different way. If I'm particularly stuck, I take a whole day to craft. I'm heading upstairs as soon as this card is posted, but stay tuned. I might be back if I can't get the story to flow.

For those of you who follow my writing career, book two of the Montana Brides series, The Kitchen Marriage (see sidebar) released this week. According to a reader in South Carolina, it's already in her Walmart. I got my author copies on Monday. Most days this author thing is a lot of discipline to keep the rear in the chair and get the word count done. Then - every once in a while - you get to see the fruits of your labor on store shelves and in readers hands. Those are really good, really FUN days. Today is a rear in chair day...unless it's a craft until the brain starts working day. Let's see, shall we?

Until next time,
Becca

Wednesday, September 26, 2018

MFT Stitched Flowers with CTMH Paper and Sentiment

I'm in the thick of writing the final draft of the last book in The Montana Brides series. Book Two, The Kitchen Marriage, just released. It's available through online retailers now and should be in your local Walmart and other mass-market stores by Tuesday of next week. I've not had much crafty time, so I'm posting a card I made last month but never blogged.


This card combines my two favorite companies. The paper and die cut "thanks" is retired from CTMH, and the scallop border and stitched flower die cuts are from MFT. I colored the flowers and leaves with Copic markers.

Back to writing. I'm tellin' ya, deadlines are great for productivity but murder on my social life!

Until next time,
Becca

Saturday, September 22, 2018

Decorative Border and Falala Thin Cut Christmas Card

A week ago, I made this card and told you to watch for the same layout. Well...here it is, this time as a Christmas card.


My favorite thing about the new Candy Apple color is how perfectly it matches the Red Glitter paper.

Here's the supply list (with links for your shopping convenience):


I don't know about you, but as soon as September rolls around, I feel the pressure to get my cards made. I love how fast, easy, and pretty this card is. I just might get my cards done before December 25th this year! Now if I can just get book three of The Montana Brides series done by deadline, I might be able to breathe.

Until next time,
Becca


Monday, September 17, 2018

Decorative Border, Fancy Tags, and Just Treats

For my third card featuring the September Stamp of the Month (SOM), I combined the Decorative Border Thin Cuts, which I've used on the last two cards, with the Fancy Tags Thin Cuts. I'm really, really happy that I purchased both of these. I'll be using them alone and in combination, as I've done with this card.


This is the large tag that has a scallop bottom. I trimmed that off in order to turn the tag sideways and still fit on my card. I then cut another tag with Linen paper and cut it again with the stitched scallop border thin cut. Now, to be honest, you could probably finagle a similar result by using the scallop border of the tag itself, but it was so much easier to do it with the border cut and that stitched edge is just such a great addition.

To color, I used the "squeeze the ink pad together until you get ink in the lid, then pick up the ink with a damp paintbrush and color" method. I used it on the card from a few days ago. It's one of my favorite coloring methods. The sentiment is stamped in Heather and colored with Mink and Pomegranate. I added some Mink Twine then secured the ends with Liquid Glass. While that was out, I added a dots of it to the berries to give them dimension and shine.

My background paper comes from the Seasonal Mix-In pack. I LOVE this pack. It's perfect for adding to the current set of paper suites or great on its own.

Well...then I started to put my supplies away and moved some paper to the side of my desk. Underneath was the "Ugly Sweater" stamp set. Sweater. Warm. Winter. Hm...


Do you see that slightly fuzzy texture. That was a mistake. My stamp pad needed to be reinked but I overdid it. But hey...if you're going to make a fuzzy image, it might as well be on a sweater. That's my story and I'm sticking to it. The heart comes from the SOM set and is also stamped in Pomegranate.

I honestly can't decide which card I like best. What do you think?

Time to head up to the writing cave. I need to pound out 3K words today if I'm going to stay on schedule. There are parts of being an author that I love, but deadlines are not one of them.

Until next time,
Becca

Sunday, September 16, 2018

More with Decorative Border Thin Cuts and Just Treats

As promised yesterday, here's another card using the Decorative Border Thin Cuts and the September Stamp of the Month (SOM) Just Treats.


I went with a traditional red and white color scheme for this card using the new Candy Apple color and 'Tis the Season Paper Pack. Remember yesterday when I talked about the fun things to do with the striped border included in the Just Treats SOM set? Well, those striped hearts were made by stamping that border twice (because once wasn't quite wide enough for the smallest heart thin cut). The other fun thing I did was to cut the scallop border from White Daisy cardstock, flip the border over and line it up so I ended up with a border of stitched circles...and wonder of wonders, the inside of the peppermint candy fit inside perfectly. It's almost like I planned it, which I didn't (but maybe the genius designers at CTMH did).

The tag was cut using an image from Artiste, which is retired but still wonderful. I dressed it up by adding some of the 'Tis the Season paper along the bottom and trimming off the excess with scissors. I also made my own ring to go around the opening of the tag. I simply used the "Hide Contour" button in Design Space to get rid of the outside edge of the tag (leaving me with only the center hole) then used the "Shapes" button to add a circle, size it to a bit larger than the center hole, used the "Slice" feature to cut the smaller circle out of the larger one, and then cut using the patterned paper. The only non-CTMH thing on this card is the wider red ribbon which is tied with White Twine at the top of the tag. I also used White Twine along the bottom of the tag between the white space and the red bottom border.

For the sake of design principles, I used the same patterned paper for two places on the tag plus on the larger heart, positioning it so it created a triangle. The stripe on the smaller hearts is similar in design to the swirled images along the bottom border, and they also create a triangle. My third triangle is the placement of the three hearts. The very bottom border of Candy Apple grounds the entire card and highlights the scalloped edge, drawing your eye so you see the fancy stitching. I used a gray marker to highlight "Friends" because it's the trend to add that swoosh and because gray is a neutral that adds interest without fighting with the rest of the color scheme.

Here's the supply list (with links for your shopping convenience):
I love tags on cards. Pretty soon I'll start showing you ideas with the new Fancy Tags, but many of you have already purchased Artiste or other CTMH Cricut Cartridges, all of which have some kind of tag. Let's make sure you're getting your money's worth out of them before we encourage you to spend more...although the stitched and pierced edges of the Fancy Tags is what pushed me over the edge to purchase them. Both the Fancy Tags and Decorative Borders are spendy, but remember you can always get them half-price if you host a party that goes over $250. With all the fun new things just released, I doubt you'll have trouble getting to that level if you know two or three people who enjoy crafting. Who knows, you might even be able to host your own party!

Until next time,
Becca

Saturday, September 15, 2018

Decorative Border Thin Cuts - 2 with Just Treats Stamp of the Month

Hubby and I went to see "Unbroken" last night. Now I know the movie is meant to be inspirational, a story of triumph over extreme adversity, but I can't handle it. As an Army Wife and Mom, my biggest fear for my soldiers is capture and torture at the hands of the enemy. I told hubs that asking me to go used up almost all of his "husband points" from the cruise.

Almost.

I couldn't go to sleep right after we got home, so I stayed up to make this...


I love the versatility of these borders. In addition to using them in the traditional way, I can create my own tags (although I purchased the new Fancy Tag Thin Cuts and will be showing you ideas with them soon). I used three of the border dies, one for the notebook paper type of edge on the top of the tag, the double stitched line around all the edges of the background paper and just under the Mink Twine, and the slanted edge across the top of the bottom border of patterned paper on the tag. The patterned paper comes from the Boutique Paper Pack. It's so fresh and trendy. I combined it with some Candy Apple accents and red coloring to change up the color palate just a smidge.


All of the stamped images come from the September Stamp of the Month (SOM), Just Treats. This set is only $5 with a qualified purchase and will take you through the holidays, Winter, and beyond. That darling little cup can be combined with the top left sentiment at any time of the year for coffee, tea, and hot chocolate. With some Saffron ink coloring, you could even make the cup hold chicken soup. It would be fussy, but you could get a Warm Comfort for You sentiment out of what's in this set...or you could just use a get well sentiment. I'm betting you already have one.

Before we quit discussing the versatility of this SOM,  don't forget about the fantastic striped border. So many fun things to do with that!

Here's the supply list (with links for your shopping convenience):


As for techniques, I used an old favorite when it comes to coloring. It's called "squeeze your stamp pad so the lid picks up ink, then use a paintbrush to pick up ink and color." I did that to fill in "Tidings," to highlight "and," and to add a slight border around the stitched heart. The cup and little red swooshes (or splash marks) were all colored with markers.

Another card tomorrow with this same SOM and more of the border die cuts. Unless I can't sleep again tonight, in which case you might be seeing it late tonight.

Until next time,
Becca

Friday, September 14, 2018

Hugs for You WYW with Decorative Border Thin Cuts

One of the new products I just had to get in my hands as soon as possible was the new Decorative Border Thin Cuts. These beauties are going to make it super easy to create fun, different, interesting cards and scrapbook page borders. Here's my first card...


I used the Hugs for You Workshop Your Way (WYW) which is a cardmaking kit. It comes with a stamp set, paper, card bases, and twine as well as instructions for making twelve cards of two different designs. If you've been around my blog at all, you know that I don't purchase a WYW unless I can use the stamp set long after the included supplies are gone. Like I did here.

I was surprised to find that this scallop border wasn't even. At first I was disappointed, but then I realized that the lack of symmetry gave me far more flexibility. I can make a cloud or hill border to set a scene, I can tilt it as I did on this card for a unique look, and I can create an even look on the short end of a 4.25 x 5.5 card with some planning. But, to tell you the truth, I really like this tilted border. You might see that show up again. And again. And possibly even a few more times.

Here's the supply list (with links for your shopping convenience):


I've already sent two cards using this WYW. The sentiments are exactly what I've wanted to say on multiple occasions.

Today is all about getting everything done that I've put off doing this week. We had such a lovely cruise (pictures to come) that it's difficult to adjust to real life again where I have to cook and clean up after myself. Plus there's the hurricane. We're in central Virginia and no longer expect to get much except some wind and rain, but I was doing a little prep just in case.

More than anything, I need to get back to 1888 and the final novel in the Montana Brides Series. Book two releases in eleven days, so there's quite a bit of publicity around that which also needs to be done...and honestly, I just want to play some more with these fancy border cuts.

Until next time,
Becca

Wednesday, September 12, 2018

Bunches of Love - 8

I'm back from my cruise and back in the swing of life. Laundry is in, the dishwasher is running, and I found a little time to craft. I'm so in love with this Bunches of Love set I just had to play with it again.


I stayed with the basic color scheme of black and red which is nearly impossible mess up.

Here is the supply list (with links for your shopping convenience):


I really need to get back to writing, but I'm still fighting the jet lag

Until next time,
Becca

Monday, September 10, 2018

Love Notes - 3

As I said yesterday, this card is the entire reason I purchased the Love Note stamp set. The ENTIRE reason. I'll be making a bunch of these cards because, honestly, who doesn't love a chocolaty frappuccino?


I created the cup using the You Are Here Cricut cartridge and basic shapes included in Design Space. Here's the cutting file (which includes some extra images I didn't use but didn't want to delete).

Here's the supply list (with links for your shopping convenience):
We should have arrived home from our European river cruise in the wee hours of this morning. I'm sure today will be filled with lots of caffeine in order to function...which is why I saved this card for today.

I have lots more ideas to share with you, but I hope you've enjoyed the last ten days of daily cards. I've already got more ideas for the Bunches of Love set featured the first week, but you'll have to wait until next month because I've used it with the October Stamp of the Month.

Speaking of which, I'll be back in a few days to feature this month's SOM. It's only $5 with a qualifying purchase...which shouldn't be hard given the number of fabulous new products that went live ten days ago!

Until next time,
Becca

Sunday, September 9, 2018

Love Notes - 2

Like yesterday's card, this one uses the Love Note stamp set with a rainbow of color.


I love the Frank Lloyd Wright architectural vibe of this card. I'm always searching for ways to have manly cards, and this one fits the bill.

Here's the supply list (with links for your shopping convenience):

  • Love Note stamp set
  • Candy Apple ink
  • Nectarine ink
  • Lemon ink
  • Willow ink
  • Emerald ink
  • Black ink
  • Black cardstock

We should be on the plane heading home from our cruise. I'll probably be worthless for the next few days, so I'm glad I scheduled all these posts ahead of time. I have one more card with this Love Note stamp set, and I'm telling you now, it's the entire reason I purchased this set. The ENTIRE reason. I hope you'll come back tomorrow to see it.

Until next time,
Becca

Saturday, September 8, 2018

Love Notes - 1

Two things you need to know about me: 1) I don't like it when CTMH changes their color palate and 2) the main reasons I became a consultant were for the discounts and early ordering of new products. Having said that, I'm LOVING the new colors introduced this year.


I only used two new colors, Nectarine and Candy Apple, on this card. They are replacing Tangerine, which was practically brand new,  and Cranberry, which has been around since CTMH opened for business. Were it not for the wonderful surprise bonus that consultants got to order all the new ink colors at an even bigger discount than normal, I would be grumbling about replacing a brand new and a staple color with what seem like only slight color changes. Well...they are slight, but that tiny adjustment makes the entire color palate bright and cheerful. They also work together much better. So...there you have it. Sign up as a consultant and you, too, will no longer need to grumble about color palate changes. Ha!

Here's the supply list (with links for your shopping convenience):


Like yesterday's card, you really want the fine point of the Micro-tip scissors for this. That tiny notch in the frame around the sentiment can get bent out of shape if you use larger, clunkier scissors. Another confession...the only reason I have the scissors is because they came in my new consultant kit. Yes, indeed, I'm really glad I signed up!

Now, I know that supply list is long for this small card, but that rainbow effect is really nice against the marble texture background. Just wait until you see what I did with it the day after tomorrow's card.

We're on the last day of our European vacation. Long, exhausting flight home, but then my own bed. Ah...

Until next time,
Becca

Friday, September 7, 2018

Bunches of Love - 7 (with Love Notes)

I love this card! It was a little fussy, although not difficult. As promised yesterday, it combines Bunches of Love with Love Note, which only shows up in "SENDING." Tomorrow I'll start featuring more of the Love Note set.


Here's the supply list (with links for your shopping convenience):


Again, this wasn't technical, but you do need to have patience to cut out the top portion. I stamped it as the set was designed, with some images left open. I also took advantage of the precise cutting to give myself a wider border around "love" than in yesterday's card. Against the charcoal background here, it needed some white space.

My cruise is winding down. We should be in Nuremburg, Germany by now. I'm probably looking forward to sleeping in my own bed but regretting that our time in Europe is coming to an end.

Until next time,
Becca

Thursday, September 6, 2018

Bunches of Love - 6

And now for something completely different...


How great is this? I simply took the longest sentiment, "thinking," mounted it on my acrylic block upside down, stamped it in five different colors (although I wish I'd done the lighter blue in a green), then stamped "hello" in black, cut it out, and glued it over the top. I think I'm going to make about eight of these. So fast, easy, and versatile.

Who knew this...

...could do that?

Here's the supply list (with links for your shopping convenience):


Tomorrow, I'm going to start pairing Bunches of Love with the Love Notes set. I hope you'll come back and see it.

Until next time,
Becca

Wednesday, September 5, 2018

Bunches of Love - 5

Here's the third card combining Bunches of Love stamp set with Hello Pumpkin paper. (See previous two posts for more.)


Here's the supply list (with links for your shopping convenience):


Like yesterday's card, there's nothing too technical going on. I trimmed 3/4 of an inch off the left side of a top folding card base and glued my strip of Hello Pumpkin paper to the inside of the card.  After stamping the images, I connected the small flower and bud trio to the main image by wetting a small paintbrush, picking up some Willow ink from the lid, and drawing some mostly straight lines. That's about as techy as this gets. Oh...and wrapping some sewing thread around my fingers and securing it with the sentiments mounted on foam tape.

I hope you'll come back tomorrow for another card with Bunches of Love.

Until next time,
Becca

Tuesday, September 4, 2018

Bunches of Love - 4

As promised yesterday, here's another card combining the new Bunches of Love stamp set with Hello Pumpkin paper. I've also added colored pencils to the mix.


There's nothing terribly technical about this card. I glued my Hello Pumpkin paper to the card base first, then stamped my row of sentiment on a separate piece of paper and glued it over the top. I stamped the main image from Bunches of Love in black, colored parts of it using dry Watercolor pencils, cut them out very close to the edge, then glued them down before mounting the center flower over the top with foam tape. Pretty straightforward but very eye-catching.

Here's the supply list (with links for your shopping convenience):


Back tomorrow with another card using almost identical supplies

Until next time,
Becca

Monday, September 3, 2018

Bunches of Love - 3

I'm not only in love with the new Bunches of Love stamp set but also the new Hello Pumpkin paper. I don't do much with Halloween, so the limited number of Halloween specific patterns combined with the large number of general patterns--including this awesome black and white print--makes the entire pack usable. You'll be seeing more of it combined with Bunches of Love in the next few days.


Here's the supply list (with links for your shopping convenience):


The only special techniques on this card were: 1) stamping the flowers and leaves in a light color (Peach and Mint) then adding the darker coordinating colors (Smoothie and Emerald) with a sponge dauber to create shading, and 2) adding water to ink squeezed into the lids of both Emerald and Smoothie, picking up the watered-down ink with a paintbrush, then flicking the colored ink over the image.

I'm still on my cruise, but I've scheduled another card for tomorrow. I hope to see you then.

Until next time,
Becca

Sunday, September 2, 2018

Bunches of Love - 2

For my second card with the new Bunches of Love set, I wanted to do something completely different than yesterday's card. I love the versatility of this set!!


Here, I used just the floral "filler" stamps and left off the outline. It was a very simple card to make, which is the best kind!

Here's the supply list (with shopping links for your convenience):


The only thing I didn't get from the new catalog is the white sequins.

I'm still cruising, but come back tomorrow for another card using this amazing new stamp set. And, if you'll let me be pushy for just a moment, let me say you should order this stamp set now. By the time it arrives, you'll have lots of ideas about how to use it.

Until next time,
Becca