Friday, January 31, 2014

Banner Wishes

This week's challenge over at Color My Heart is Crème Brulee, Olive, Goldrush, and Twilight...and a (sortof) sneak peek.  The new catalog goes live tomorrow and Banner Wishes, which was in the Holiday Mini, is making a reappearance.


I also used One Way Borders as the background stamped in all four colors.  I added a piece of Twilight cardstock to the side panel, mounted the sentiment on foam tape, and there you have it.  About as quick and simple as it gets.

Until next time,
Becca

Thursday, January 30, 2014

Stretching Winter into Spring

Hi everyone, it's Becca with my final Frosted Workshop on the Go post.  Today and tomorrow is your last opportunity to order it, so be quick like a bunny.

Speaking of bunnies, Spring is on it's way (though you wouldn't know it by the weather around here), and the color palate is very different than for Winter.  That doesn't mean you can't use your Frosted WOTG stamps.  Here's a card and scrapbook page using Blush, Honey, Pear, Sunset, and Lagoon.


I love that ric-rack stamp; it's incredibly versatile.  I stamped it randomly in multiple colors on the card banner, and then as an accent on the scrapbook Blush banner using Sunset ink.  Can you see the wreath pattern on the scrapbook Blush banner? Here's how I did that:

Using a ruler that's 1.25" wide, I drew pencil marks on a piece of Blush cardstock in a grid pattern.  I wasn't fussy about measuring to be sure my vertical lines were exactly centered, and then I crossed with horizontal lines using the top of the cardstock as my starting point.  I took the wreath and stamped in Blush ink so the X of the pencil lines was in the center of the circle.  After that, I went back over it and lined up the wreath's outside circle with the square pencil lines. When done, I erased the pencil lines and, voila, I've got a subtle background texture.


And here's an "in process shot" of the card banner.  After randomly stamping the ric-rack image, I clear embossed the large "Simple Pleasures are Priceless Treasures" sentiment over top at a wonky angle. Using a sponge dauber, I sponged Blush ink up to the edge being careful not to ink over the words.  (Note: this technique will also work if all you want is part of the sentiment, or the sentiment without the border. Just sponge over the part you want and leave the rest alone.) When I was done, I put a clean piece of printer paper over top and ironed away the clear embossed image.  You'll have to move the paper around and iron over top a few times to get the embossed image off, and even then there will be a slight residue. 

A true CTMH enthusiast will think the yellow striped banner on the card and yellow polka dot banner on the scrapbook page came from an old paper pack.  Nope.

I was running out of room in my storage boxes and decided to remove all the papers from my stamp sets.  The double benefit is now I can see my stamp sets without having to pull them out of the storage box.  I also did some consolidating and weeding.  By the time I was done, my stack of excess stuff was eight inches high.  Room for more stamp sets!!

The yellow polka-dot was on thinner paper so some of the print from the back side (telling you how to care for your stamps) showed through.  No problem, run a piece of Lagoon Washi tape over top.

The small wood shapes on the scrapbook page are discontinued, so I included a link to the current pack with similar shapes.

Just because a set is called Frosted, doesn't mean it can only be used for cold weather projects.

Until next time,
Becca

Product List

JANUARY SPECIALS
Cloud 9 special jan som

Thursday, January 23, 2014

All Bundled Up

Today is another DrPhilScraps.com post using the Frosted Workshop on the Go kit and complimentary products.

What happens if you love a particular WOTG but aren't thrilled about the scrapbook layout (or card projects) which come in the package?  You steal from other projects, that's what!

Here's a picture from page 97 of the current catalog:


Darling, right!  So I stole pretty much everything about it to create this:


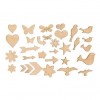
Those of you with a keen eye will notice that all the stickers have been cut out. Every CTMH sticker has an excess around it to ensure you get the full pattern in case the cutting machine is just a little off.  I took advantage of that for three reasons: 1) I'm cheap (I didn't have personal photos to scrapbook with this and I didn't want to waste my stickers), 2) I always lay-out my entire page without sticking/gluing anything down to make sure I'm happy with it before it's too late to change anything, and 3) the tags on the left side of the layout needed extra "weight" to them.

Look back at the example picture again.  The tag has bold color and layers.  All these things add "weight" to the tag.  Even by combining two tags and the saying, my cluster doesn't have either the size or impact of the example.  If I were doing this for real, I would keep the borders around the Frosted stickers simply to make them bigger.  The addition of the two stars at the top left were also to lengthen/add weight to that side of the layout (although it's not a lot because they are a neutral color).  If I had actual pictures, those stars would probably be unnecessary.  Or, I might move them down to join the tag cluster.  (See, this is why you don't stick anything down until you're completely happy!!)

To successfully steal a layout, you need to note nitty-gritty details.  The example picture has a multicolored, busy pattern on the top right. I did the same.  The example has a large piece of plain, contrasting paper in the middle.  I pulled a muted pattern piece which contrasted against my background and the multicolored pattern.  The key is contrast between the paper on the right (multicolored) and the paper on the left (Crystal Blue base).  The example has pictures where the girl's outfit and hair bow has a bold color.  Instead of ignoring that, the artist chose to highlight it by choosing paper with the same color to create the background.  My "photos" have no bold color in them.  Plus, the stickers have no bold color in them.  Adding a bold color would have overpowered this layout.

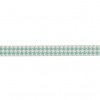
Last but not least, note that the two pieces of Slate Washi Tape and snowman sticker share the same color and pattern.  By placing them in a triangular pattern, the eye is drawn around the page.

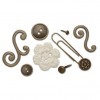
The bow at the bottom right was created using the Artiste cartridge as explained in this post.

As for the measurements, I eyeballed it.  The Crystal Blue paper is cut at 10.5x10.5 and mounted on a 12x12 piece of Colonial White; the multicolored paper is 4x4; the muted pattern is 6x4, the snowflake inside wreath pattern is 3.25x2; the zip-strip is 8 inches long to match the width of the Champagne piece which is 8x43/8.  The two "photos" are 4x4 and 4x3.5.

With a little attention to detail, you can adapt any example to your products and pictures.  Sometimes, stealing is a good thing!

Until next time,
Becca 

Product List

JANUARY SPECIALS
Cloud 9 special jan som

Friday, January 17, 2014

Ode to Sleepless in Seattle

This week over at Color My Heart, our challenge is to use the following colors: Cranberry, Juniper, Smokey Plum, Sunset, and Honey.  Paying tribute to my (almost) home town by way of the movie "Sleepless in Seattle", I made this card:


Remember when the Empire State Building lights up while Meg Ryan and her thinks-he's-funnier-than-he-really-is fiance (played by Bill Pullman) are having dinner? She see's the heart and says, "It's a sign."  Well...I'm hoping I can channel enough energy via my screaming and general lunacy to "give a sign" to my beloved Seahawks and cheer them to the NFC Championship on Sunday.

But enough about Seattle and football.  Here are the card details (all supplies in italics are CTMH):

  • Stamp set: Cityscapes
  • Ink pads: Black pigment, Juniper, Sunset, Smokey Plum, Honey
  • Marker: Cranberry, White gel pen (to create "stars")

I stamped the city skyline in Black pigment ink because I wanted full, rich coverage. I had to wait about fifteen minutes before putting my masks over the top to sponge the sky, but it was worth the time and effort.  I used a sponge dauber for the Honey colored "lights" in the buildings.  I wasn't terrible fussy about getting good coverage because a little shade variation made it more interesting. The sky was done with dye ink pads and sponge daubers to give it a streaky effect.

The final step was to mount the image onto a white mat and foam mount it onto a white card.  The white mat against white card is just classy looking.

I'm going to stretch just a little and link this to the Heart2Heart challenge.  This week's assignment is to use the letters C-T-M-H in your project.

C=Cityscapes stamp set
T=Twilight...not the ink color but the image is a city at twilight.  (Told you I was going to stretch a little.)
M=Masking technique
H=Heart

And now back to our regularly scheduled lunacy...

GO HAWKS! GO HAWKS! GO HAWKS! GO HAWKS!

Until next time,
Becca

Thursday, January 16, 2014

Through the Years

I'm featuring the Frosted Scrapbook Workshop on the Go again, this time with an eclectic layout.  My original intention was to show you how this paper would work for a baby boy theme page.  (With the Blush paper that is part of the pack, it would also work for a baby girl page.)  But as I was looking through old photographs, I found a whole bunch of single photographs which would never make a full layout on their own...so I put them all together.


The neutral Champagne and Frosted Turquoise allow the photographs to take center stage.  That blue is so subtle, it doesn't fight with my very colorful photographs.  Because the Frosted kit doesn't come with two pieces of Champagne, I did have to pull one piece from the cardstock sold separately. I tried this layout with the Colonial White as my background (because you do get two of those pieces in the kit), but it just wasn't working.

Since the pictures were such a jumble, I  accentuated the randomness by making my photographs and accent images off-kilter and layered one on top of another.  The only plan was to put the "baby" photographs on the left side and the "older" photographs on the right side.  (My son is twenty-seven, so "older" is a relative measurement.)  Once the page was done, though, I noticed that I had circular shapes running across the top and in the camera image on the far right.  I took a leftover piece of the overlay in the title and put it down in the left corner.  That gave me a triangle of circular accents to balance the overall layout.

I used Cricut Craft Room to size the various elements from the Artbooking cartridge (pages 40, 43 and 79).  I cut the title from Colonial White cardstock using the Artbooking alphabet.  The banner I cut by hand and layered it with more of the Frosted Turquoise arrows.  The words were stamped with Twilight ink using the Wheel of Life stamp set.

This was my first time using the Artbooking cartridge for a scrapbooking page.  Have to say I loved how easy it was to pull the various elements together.  It's not my normal style of page.  I'm usually much more--shall we be  kind and say--orderly.  It often works against me as I get too worried about the background.  Sometimes a "git 'er done" page works!

Until next time,
Becca

Thursday, January 9, 2014

Heartfelt Thanks

(Second post for the day.  Scroll down for my DrPhilScraps.com post.)

It's been a long time since I got in my craft room.  Love vacation; love being home more.  I mean, what's not to love about your own bed and a dedicated space just for crafting? 

However, there are a few vacation details left to clear up...like a thank you note to my parents for going above and beyond to put us up, loan us a car, and generally spoil us rotten for almost two weeks. I wanted to create something extra special and, by combining Color Q and Mojo Monday, I think I've done the trick.


The colors are CTMH Slate, Honey, Ruby, and Smoothie.  I am totally in love with this color combination.  It's not one I would have thought of on my own, but it's so chic!!  The sentiment is from Verve stamped in Ruby ink.

To make my dots, I punched out three different sizes of circles from Ruby cardstock, adhered them to my card, and topped them with a thick layer of Liquid Glass

And, so you know, the random stitching on the honey circle was planned that way.  Unlike too many other cards, this was not a flub that I "covered up" by doing something wonky. Really!

The hardest part of this whole card was letting the Liquid Glass dry.  I had to kill time by cleaning up my craft room mess.  I mean, who wants to do that??

Until next time,
Becca

See "Frosted" Differently

Today I want to show you how to stretch your Frosted Workshop on the Go Scrapbooking Kit.  If you are like me, you end up making a few scrapbook pages, and then you have bits and pieces of leftovers that hang out for the next ten years.  Not to mention an adorable stamp set that rarely sees the light of day.  Why not put them to work?  Here are a couple cards that take you to Valentines and beyond.


For the "Love, love, love You" card, I took the long banner that says "You melt my Heart" and inked only the end with the "You" on it, stamped it on white cardstock, mounted it on my card, and trimmed off the excess.  The hearts were inked in Cranberry Pigment Ink (from the Adventure set), stamped across the ric-rack border before stamping onto white cardstock, then embossed in clear.  The black border down the left side is also the long banner (same one with the "You" on it).  I simply inked one edge and stamped it on the B&T paper.  In order to get the line straight, I drew a light pencil line about 1/4" from the edge of the B&T paper.  I had to give the Black Ink time to dry, but I was able to erase the line without smudging the ink after about fifteen minutes.
 
For the second card, I used my Cricut Artiste cartridge and cut the button from page 46 at 1" in the
center of a 4x4 piece of white cardstock.  (Yeah, so I used it as a circle, but the leftover piece is a button so you might be seeing that later.)  I then trimmed it down to 3.5x3.5.  You might be better at centering things than I am, but I have to use this method.  I stamped the wreath in Black Ink

I foam mounted the 3.5x3.5 white cardstock over top of a 3.75x3.75 piece of black cardstock that had been glued to a 4.25x4.25 card base.

The bow is also from Artiste (p. 55, cut at 3/4").  The cut has small holes to line up so you can insert a brad as shown.  I used a corduroy one that has been in my stash for...hmmm.  It's a perfect example of leftovers that can be used to finish off a card or page as long as you are willing to think outside the box.  I slid the bow down until the back prongs of the brad caught along the bottom edge of the circle then used a bit of Liquid Glass to make sure it stayed secure.

Once you start seeing your stamps and paper as more than just a winter theme scrapbooking kit, you can come up with plenty of ways to use both the paper and stamps. 

Until next time,
Becca


Friday, January 3, 2014

Blue Blessings

For Christmas this year, my mother requested a set of cards.  One of her favorite ways to close a conversation is with, "Blessings," so I pulled out a couple of retired sets and combined it with this week's Color My Heart challenge to bring you this:


The flower is from the You Are My Happy triple set special from October 2013, and the sentiment is from Friendship Blessings set which retired a long time ago but is still a favorite of mine.

I white embossed the flowers onto vellum and then smushed my Pacifica, Lagoon, and Sky ink pads together to collect ink in the lids.  Using my watercolor brush, I dropped splotches over the top and let them dry.  The last step was to pick up even more ink and flick it over top to get the smaller, more intense colored droplets.

I cut the flowers out leaving a small border around the white embossing and adhered them with a small dot of Liquid Glass.  The flower tucked behind the front two is actually half a flower.  Since it was going to get hidden away, there was no sense wasting a whole flower back there.

The sentiment was stamped in Pacifica pigment ink and embossed with clear powder to have it have the same shine as the white flowers.

The panel with the flowers and sentiment on it was trimmed to 4x5.25 and mounted on a 4.25x5.5 card using foam mounting tape.

Mom loved the cards, but the problem with that is she'll use them all up and want more for her birthday in March.  Better get crafting!

Until next time,
Becca

Wednesday, January 1, 2014

Top 13 of '13


How fun to be part of the OWH Top 13 of 2013 Blog Hop.  After discovering several "Clean and Simple" (CAS) blogs and participating in the challenges, my personal style has begun to take shape.  As a result, most of my favorite cards come from the latter half of the year.  Here they are in no particular order with links to the original posts so you can read the details if you'd like:


Five Layer Fly Away
Love the juxtaposition of the patterns at tilted angles against
the very straight and uncluttered focal panel


Burlap & Lace Best Wishes
I pulled out stamps that hadn't been used in a long time to customize a congratulations card for a special friend who got engaged this year.  Her wedding theme is burlap, lace and peonies.
Um...nailed it!


I created the picture panel entirely with a glue pens and embossing power.
It was my own idea! (Not and OWH-worthy card because of the glitter, but
I don't come up with original ideas often so it had to make my list.)


The sketch had me stumped and I thought I was going to tank my Guest Designer spot.  I gave it a few days and this card "just came" to me.  Love how it turned out!
 
 
So frilly and fun with the fabric ruffles.


I bought the glasses stickers because they were so, stinkin' cute...and because I had the eye chart stamp which had been sitting unused for too long.  Love when one product helps you put another to good use.  And sequins...  LOVE sequins.  What a great way to add bling without glitter.
 

So classy and elegant, I can hardly believe I came up with it.
 

The first CAS card I really loved.  My success with this one encouraged
me to keep pursuing this style of card over the rest of the year.
 

Something about that yellow banner--which is so not Christmassy--just makes me happy.

Another "unworthy" OWH card due to the glitter, but still a favorite of mine.
 

I wrapped grocery store twisty ties with Washi tape. 
Not my original idea, but still a very cool result.


Color Dare #53 and the Patience of Job
That background took forever, but I literally was having
trouble sleeping until I executed an idea.

My original idea to use adhesive springs to create multiple layers of butterfly wings. 
Again, I don't come up with original ideas often, so this was a "mark your calendar" kind of thing.

Well, there you have it, my personal favorites from 2013.  Hope you enjoyed them.

Until next time,
Becca