Saturday, December 26, 2015

Mr. & Mrs. Snowman

Hubby and I celebrated our 31st Anniversary last Monday.  I made him this card using stamps from a long-retired, wood-mounted set by CTMH:


I stamped the lady first, masked her left side, then stamped the man. I used about thirty colors of Copic markers to get the shading and chose Seahawk colors to coordinate with the neck scarf I got him for his gift.  To keep from obscuring the view of all my coloring, I used clear snowflakes from Heidi Swapp.  It was a lot of work, but my husband's look of awe and, "I love that you can do this," made it all worth it.

For those of you who might have missed it yesterday, my Christmas novella "Letters from Santa" is still free today on Kindle only.  The sale is gone at the end of today, so hurry and get your copy.

If you link through and see only the $5.97 print version, click on "See all 2 formats and editions" just below the reviewer stars to see the Kindle only format.

I'd like to get up to 40 reviews on this so, even if you don't like the story, I'd really appreciate your honest opinion. (I always mistrust all 5-star reviews. Don't you?)

I hope you all had a Merry Christmas.  We hosted four single soldiers who couldn't make it home this year.  It was the first year where I fully embraced this army tradition.  I think God rewarded me for finally getting the proper attitude by sending us a man who was born in what he describes as the bush of Kenya.  He didn't want to eat off my everyday plates because they were too fancy and took home a paper napkin because the print was so beautiful.  How humbling and rewarding to be in the presence of such gratitude.

Until next time,
Becca

Friday, December 25, 2015

FREE for Christmas


As a special gift to you, I made "Letters from Santa" free today. Please share the link and give it as a gift to anyone you know likes to read.

Merry Christmas!
Becca

Wednesday, December 23, 2015

Kaleidoscope and Baby Zoo (and Farewell)

This is my last post for Mary Brooks as a design team member.  How is that even possible???  I have three cards today to show a few more ways to use the Kaleidoscope Workshop on the Go and Baby Zoo stamp set together.  I have lots of pictures today, so let's get right to it


This first card piles on the fun.  Instead of using a standard size, I cut it down to 4.25x4.25 and let my images run over the top.  It will fit in a standard A2 envelope, so you get loads of impact without having to pay for extra postage.  I used a regular black ball point pen to add the stitching.  The balloons are spaced by using a small bit of Foam Tape. I think everything else is pretty self-explanatory, but leave a comment if you have a question.


For the second card I stayed with a birthday party theme.  I stamped the lion in Canary, watered down some of the Pixie (using the squeeze the lid into the pad method explained here), used a small brush to paint over his mane and tail, used more of the Pixie to add blush to the cheeks and color the ears, and then watered down some Slate ink to create the shadow.  I used a Sharpie pen to outline the Lion and a black ball point pen to outline the mats.  I think I'd like this better if the lion had been outlined with the smaller ball point pen, too.  I love that the birth announcement stamp from Baby Zoo can be selectively inked to make a party invitation.


The last card was difficult to photograph.  I used the bow, circle border, and "congratulations" stamp from Baby Zoo with the cake building stamps from Kaleidoscope to create a wedding cake.  The patterned paper banner was given a wash of watered down Pixie ink to give it a little more muted look.  The yellow fish-tail banner at the top was created by stamping the smaller of the two cake pieces, trimming it out very close, and cutting a "V" in the bottom.  The cake stand was done by stamping in Slate ink, keeping the stamp and inkpad connected, and swiping the stamp off the edge of the inkpad.

Before I show you how many supplies I have left, here's a picture of all the cards I made this month.


Here's a picture of the supplies I have left after making them and the 15 cards that come in the kit.


To be fair, I'm a "Clean & Simple" (CAS) card maker, but even so...that's a lot of supplies after 26 cards.  There's over half of the shimmer trim roll left.  In case you aren't already convinced that you absolutely need this combo, I did a little math (using a calculator because it's safer on my brain cells). I added up the Kaleidoscope WOTG, Baby Zoo, all four ink pads, and an extra pack of White Daisy cardstock.  Then I divided by 26.  The cost per card comes to $3.12.  I dare you to find a card in the store for that much...one you'd be proud to send, that is.

Here's the list of supplies (with embedded links for your shopping convenience):
My thanks to Mary for allowing me to be her guest designer these past few months.  We are talking about a second go around, but I'll have to see what my writing schedule looks like.  I have some extraordinary news to share about a new contract, but I have to wait until the i's are dotted and the t's are crossed.  In the meantime, I hope you will take advantage of a two-day sale on my Christmas novella, "Letters from Santa," which will be FREE on Christmas Day and the day after Christmas.

Wishing you and yours a very Merry Christmas and a blessed New Year!

Until next time,
Becca

Sunday, December 20, 2015

Special Care

I have a very special friend who is expecting a precious little girl in a few months.  Using the sketch from Mojo Monday #428, I pulled out some old stamps and supplies for this card:


The tag says, "Special Care and Treatment: Feed Frequently, Tickle Gently, Encourage Often, Kiss Generously."  Good advice for any new parent.  And I love how the sentiment matches the background I created with the baby clothes hanging out on a line to dry.

Time to get ready for church!

Until next time,
Becca

Thursday, December 17, 2015

Baby Cards with Kaleidoscope and Baby Zoo

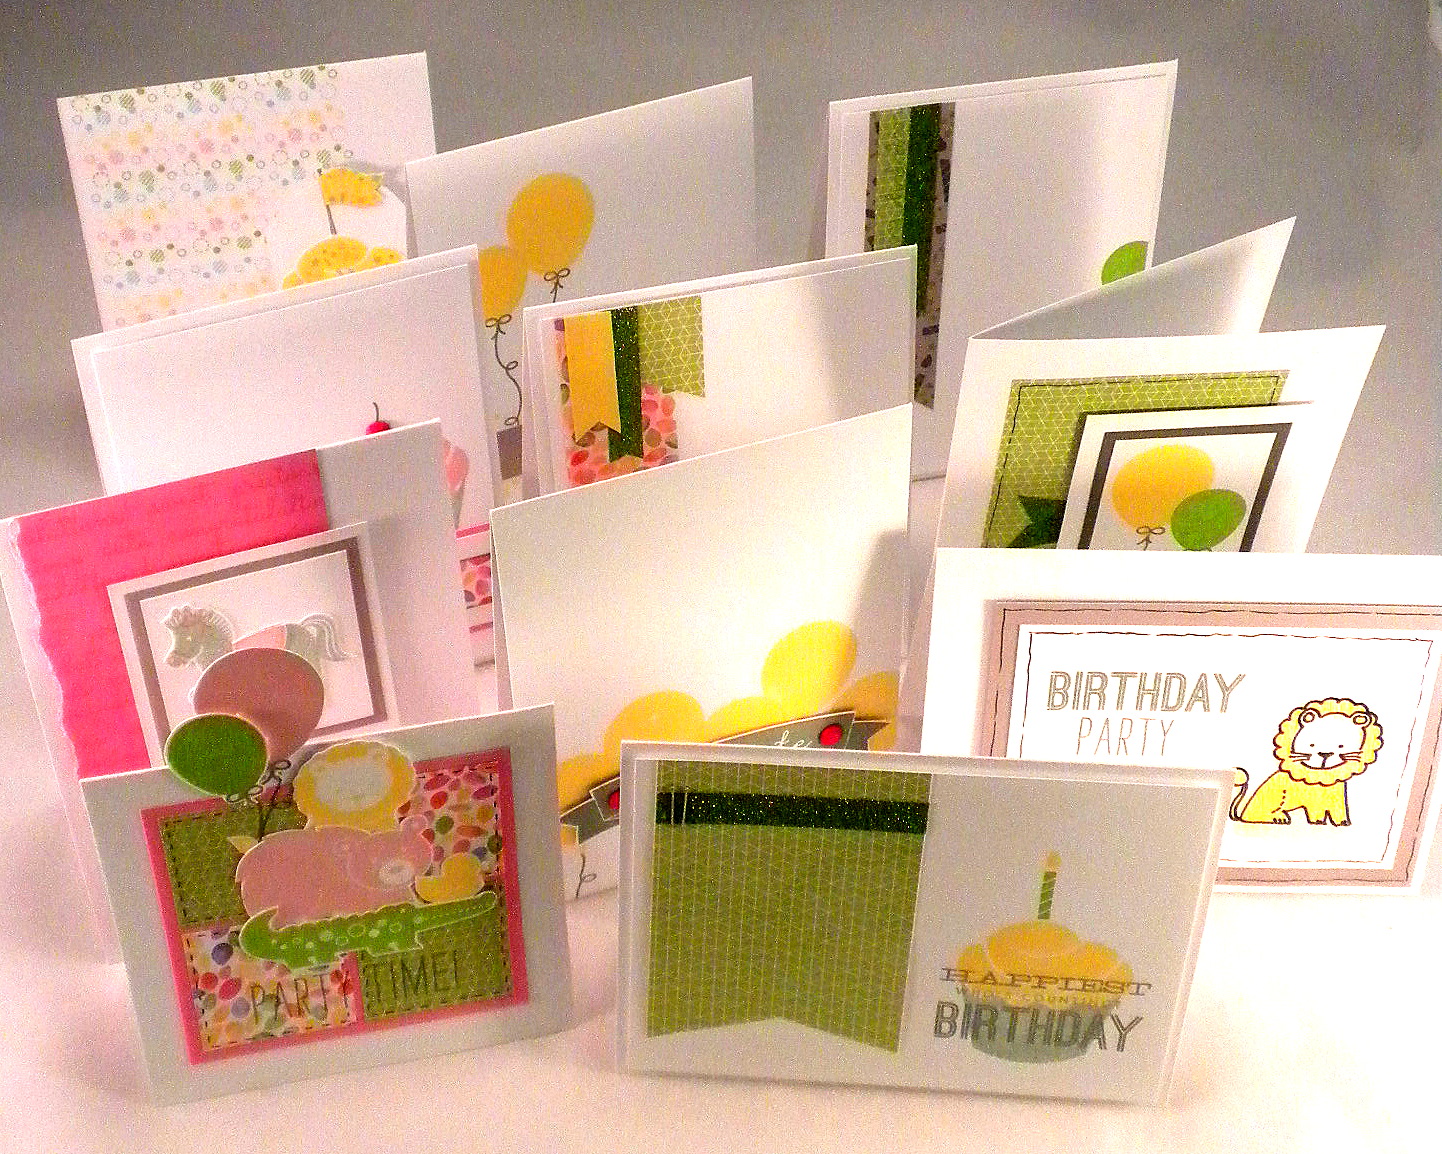
Last week for design team duties with Mary Brooks, I created three birthday cards.  This week, I want to show you a couple baby cards.  I'm still working with leftover supplies after completing the Kaleidoscope Workshop of the Go and the suggested ink pads of Slate, Pixie, Canary, and Pear but I added Crystal Blue this week.

I've been making use of second generation stamping quite a bit to fade the stronger Slate ink color to match the Whisper colored cardstock that comes in the WOTG.  I did the second generation stamping on the horse.  I stamped the horse again in Pixie ink, squeezed the lid and ink pad together so I could "watercolor" with a wet brush (see the third card from this post for an example) to get the softer pink on the saddle, cut out the saddle and glued it over the top of the horse.  I also used the watercolor Pixie on the bridle.  Everything on this card comes from Baby Zoo except the bow that's stamped in the horse's mane.  I know...it feels a little like I'm cheating to say I'm combining the two stamp sets, but think how many times you could use that bow to create "girlie" animals from Baby Zoo.

For the background paper, I stamped "Congratulations" in Pixie ink onto Pixie paper except for the one time I stamped it in Slate.  I tore the edge of one side only.  To get the paper to tear so the white core is exposed, tear toward you.

This next card is the one I've been waiting to show you for MONTHS!  I know...it doesn't look like much right now but wait...wait...

 
It's a gender reveal card!!  That's why I needed the Crystal Blue ink pad to go along with the Pixie so both genders are represented.
 
The easy way to do this card would be to cut a strip of the patterned paper that comes in Kaleidoscope.  The problem was it overpowered my cupcake, so I created a less busy background using the dot border from Baby Zoo.
 
The tag measures 1.75" by 6.75" and is scored at 3" and 4" from the bottom then rounded on the top.  The cupcake wrapper was created by stamping in Slate and then, with the stamp and ink pad still touching, sliding the stamp straight down off the edge of the ink pad. I stamped it on a separate piece of White Daisy cardstock, cut it out, folded my tag into the "Z", and glued the wrapper image at the bottom of the fold. I stamped the cupcake top and sprinkles (Kaleidoscope WOTG) plus the "It's a" flag from Baby Zoo, and glued them in place on the top part of the "Z" fold.  Both the cupcake and flag got Pixie and Crystal Blue sprinkles to carry the "Is it a boy? Is it a girl?" theme forward.
 
I stamped the inside before doing this next part, but the fun of a gender reveal card is the suspense of waiting... **Wicked little laugh**
 
To keep the cupcake closed, I did two things.  I poked holes with a piercing tool and used a needle and sewing thread to tie a bow.  The problem was the top part of the tag wanted to fall down, so I added a Hook & Loop dot.
 
 
The two closures worked together to keep the gender a secret until...
 
 
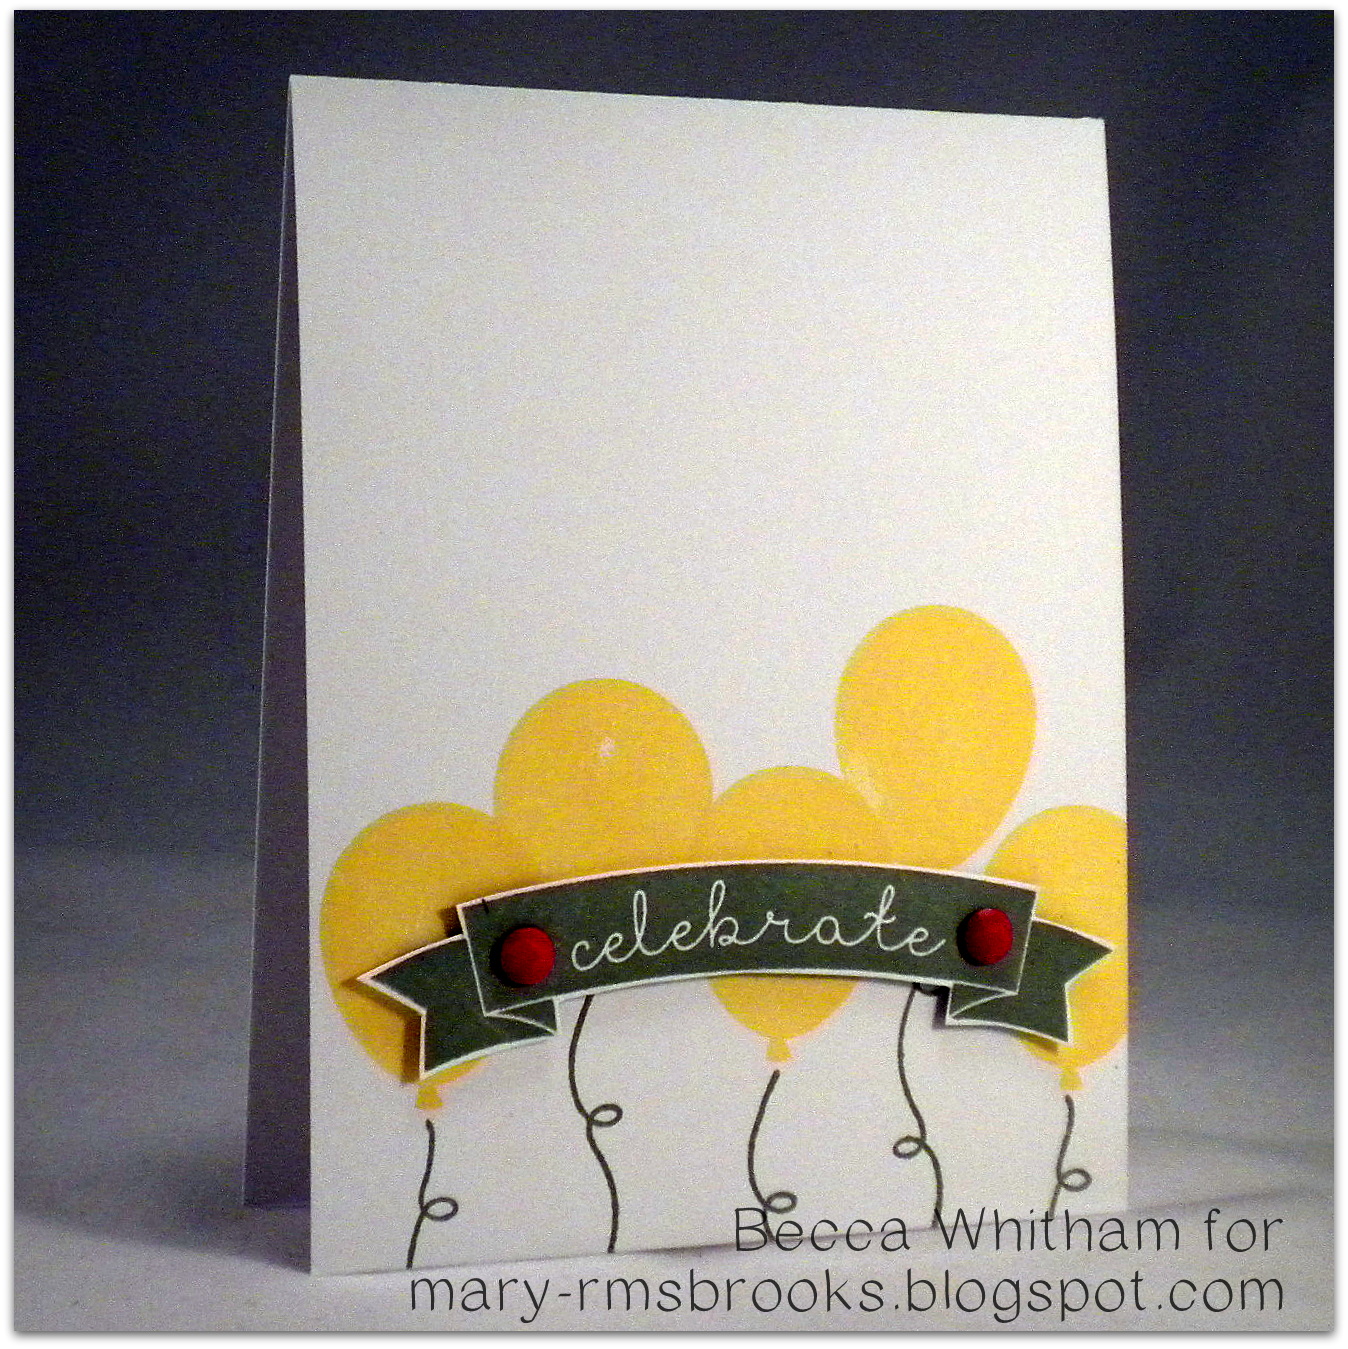
Clever, right?  And I thought of it all by myself. (I'm so very proud. I usually have to copy someone else's creative cuteness!)  The balloon and string come from Kaleidoscope WOTG, and "BOY!" comes from Baby Zoo.
 
Here's the list of supplies (with embedded links for your shopping convenience):
I'll have three more cards for you next Wednesday instead of Thursday (because it's Christmas Eve), and you'll be amazed how many supplies I still have to work with.
 
Until next time,
Becca

Saturday, December 12, 2015

Twelve Days of Christmas Blog Hops with Heart


Is Christmas music going non-stop at your house?  If so, you've undoubtedly heard "The Twelve Days of Christmas" play a few times.  Inspired by this beloved (or maybe annoying) song, Blog Hops with Heart has put together several things for you to enjoy. 

Here's my "partridge in a pear tree" or wreath, as the case may be...


It's a very simple card, and I must give credit to the inspiration piece which can be found here.
 
I love how elegant the Cranberry and Cashmere color scheme is.  I've used most of my "White Pines" paper, so part of why I was so excited about the inspiration card was being able to use the merest scrap of paper in a fun and unusual way.

Here's a close up of my partridge. I cut it with Artiste (p. 51) at 2" W out of vellum. I crinkled it up to give it a little extra "oomph" before gluing it down.  I had the entire card assembled when I remembered I needed it for the Twelve Days theme and, luckily, had the foresight to attach the sentiment banner only at one end.

It's always difficult to photograph vellum.  It shows up better in real life.

The hardest part about this card was adding all the star sequins.  I was rummaging through my "accessories" drawer when I found a zip lock baggie full of them.  I have no idea where they came from, but they were perfect for this. I tossed a pinch onto my card, fiddled around until I got them arranged how I wanted, and used Liquid Glass to glue them down.  All I can say is, thank goodness for tweezers!

Go on to see what Stephanie has for you.  And then keep going until you've circled back to where you started.

Wishing you and yours a very Merry Christmas!

Until next time,
Becca

Thursday, December 10, 2015

Kaleidoscope WOTG meets Baby Zoo

Let the fun begin!  Ever since Mary Brooks and I have been planning my time with her as a design team member, I've been waiting to show you the combination of Kaleidoscope Cardmaking Workshop on the Go and Baby Zoo. 


Like last week, I'm still working with leftover paper after creating all 15 cards for the WOTG, and I'm sticking with the four ink colors suggested. Today is more with birthday cards.  Next week, I'll add baby cards.  Okay...here we go!


I used "Boy" and the border of small circles from Baby Zoo in combination with the balloons, string, and "Birthday" from Kaleidoscope.  For the fun of it, I notched the edges of the Whisper cardstock after it was glued to my card base.


Everything here is from Kaleidoscope except the elephant.  I'll be using this as an "Oops...forgot your birthday" card.  I made it in gender-neutral Pear and Slate because, when you're late getting a card out, you need to grab whatever's handy rather than fussing over "girly" vs. "manly" color schemes.

The only accessory I used that's not in the WOTG is Foam Tape.


On this card, all but "sweet" comes from Kaleidoscope. The two accessories not in the WOTG are Foam Tape and a Sponge Dauber.

The patterned paper is 4" by half-way between 1/2" and 3/4". It was just an odd bit leftover after I cut all the paper needed for the 15 cards in the WOTG. I sponged the edges with Pear ink, mounted it to a 4"x1.25" piece of white cardstock, and mounted both onto a 4"x 1.5" of Pixie cardstock.  Once I had these glued, I worked on the sentiment.

The small sentiment from Kaleidoscope reads "Hope Your Day Is". By carefully inking, I got just the first two words on the top line. I cleaned the stamp well, added "sweet" on the end, then carefully inked just "is sweet" and stamped it on the bottom line. I added the separate sentiment "Birthday" in the middle.  I was lucky enough that my stamping came out okay.  Sometimes I have to start all over again if my hand shakes before the ink touches the paper.  That's why I stamp before I adhere the strip to the card.  If I mess up, I've lost three small bits of paper.  Otherwise, the whole card needs to be redone.

I stamped the cupcake base in Slate, stamped off on a scratch piece of paper, then stamped a "second generation " image onto my card.  To create the cherry, I inked one end of the balloon string in Slate, stamped it at the apex of the cupcake frosting, and added a dark Pink Enamel Gem over top.

Here's the list of supplies (with embedded links for your shopping convenience):
I hope you're starting to see the possibilities and can see why I'm having so much fun!  Add them to your Christmas wish list so you're ready to get those birthday and baby cards going after the holiday rush is over.

Until next time,
Becca

Thursday, December 3, 2015

Kaleidoscope Cardmaking Workshop on the Go - Using Leftovers

Oh...I'm so excited to get this new month of design team duties for Mary Brooks going!  I'll be featuring the Kaleidoscope Cardmaking Workshop on the Go...and maybe I'll know how to spell it by the end of the month!

Like all CTMH Cardmaking WOTG kits, Kaleidoscope comes with stamps, paper, accessories and a package of cards & envelopes to create 15 cards.  You have to add the coordinating inks, which are Slate, Pear, Canary, and Pixie in this case. I put together the entire workshop and will be using the leftover supplies to show you what else you can do.  It's going to be a lot over the next four weeks, so here's a picture of the 15 cards made per the WOTG guidelines offered as proof I'm not fudging:


To my eye, the addition of pink makes all these feel a little girly.  So...here are some "manly" -- or at least ones that won't offend masculine sensibilities -- cards made with leftover patterned paper and accessories (adding only White Daisy cardstock and a few other items):


The WOTG comes with Pink Enamel Gems.  I used almost all the light and medium pink ones on the 15 cards.  All the red gems were leftover. You could make six cards like this using only the large size gems. And when you run out of those, you have medium and small sizes left.  And when you run out of those, you can make your own by punching circles out of Cranberry cardstock, gluing them down, and adding Liquid Glass over the top.  Since there's no patterned Kaleidoscope paper on this card, you can keep making this card over and over and over.  My only additional supply here is Foam Tape under the banner, but you don't have to use it.


I borrowed the banner idea from one of the cards in the WOTG.  In addition to Foam Tape, I added regular staples over the Green Shimmer Trim. It's a household item that doubles as an accessory, so I figured it was fair to use. (BTW, there's 5 yds. of shimmer trim on a roll.  The 15 cards used 70" which comes to just under 2 yds. Yep, I have over half the roll left to play with.)

For the cupcake bottom, I used Slate ink but stamped it onto scratch paper before stamping a "second generation" impression that's lighter onto my card. The sentiment is stamped in both Slate and Pear.  I fit the three stamps together, peeled out the center stamp, inked and stamped "Happiest" and "Birthday" in Slate, then stamped "Who Counting?" in Pear between them.

If you've been coming to my blog for any length of time, you'll notice I do a lot with 4x5.25 white panels foam mounted over top of a 4.25x5.5 card base. While the smaller top panel isn't necessary, it does hide the underside of the staples so the inside of my card is pristine.  Plus, it just looks cool.


This was the last large chunk of patterned paper...from one of the two pieces included in the WOTG.  I still have almost an entire sheet left.  I added a Sponge Dauber and Foam Tape (which is optional) and used another "pretty much everyone has one of these lying around the house" items -- a fine point Sharpie.

The gray mat around the balloon is Whisper cardstock from the WOTG.  I sponged the edges in Slate to get the deeper color.

Here's the list of supplies (with embedded links for your shopping convenience):
What has me most excited about the Kaleidoscope birthday theme stamp set is pairing it with Baby Zoo. I can't wait to show you what you can do with two stamp sets that coordinate as perfectly as these do.

Until next time,
Becca