Sunday, April 17, 2022

National Scrapbook Day Blog Hop


Welcome to the National Scrapbook Day blog hop. There are five different product bundles - plus one mega bundle - featured in this hop. I'm so excited to see what everyone has done. You should have come from Show and Tell with Michelle, but don't worry if you started here. The hop is a circle, so just keep going until you get back to where you started. Head over to Melinda's blog for a full list of participants if you get lost along the way.

I'm featuring the thin cuts and embellishments from the "Circles and Patterns" bundle with paper from the "Little Penguins Mini Album." Click here to see all five bundles.


I'm so in love with how this turned out!! My daughter is pregnant with her second child. For the gender reveal, she took her firstborn to their church for a photo shoot. Inside that egg are either pink or blue candies. My daughter sent us this as a teaser until the big reveal on Easter Sunday. So mean!! 

To create this layout, I started by cutting six circles, one each of the background and texture paper. After they were cut, I cut one more from some Lemonade and another from White Daisy. I'll point out where I used the last two in a moment. I then cut an 11x11 sheet of black and a 10.75x10.75 White Daisy piece. I splattered Black Shimmer Pen on the smaller White Daisy, adhered it to the Black, then adhered everything to a 12x12 piece of White Daisy with no splatters on it. I then started figuring out my circles. 

I stamped one center and one outer leaf shaped one in Nectarine over White Daisy using the small stripe stamp from the "Circles and Patterns" bundle (see top left and bottom middle circles). I sponged Flamingo ink to the bottom left leaf shape of the top middle circle so I didn't have white on white. The top right leaf of the top right circle is White Daisy sponged with Flamingo and then stamped with the weave pattern from "Circles and Patterns." It doesn't really show up well, but it's there. I promise. And lastly, the top right leaf of the top middle circle is the light side of Lemonade cardstock stamped with the flower pattern from "Circles and Patterns." It's so great to have the stamps that allow you to add some patterns to scraps of cardstock! I only needed a 2.5 inch square of patterned paper from the "Little Penguins Mini Album" to create this layout. 

My Versamat came in really handy when it was time to assemble. I lined up the points of my centers at the 3, 6, and 9 inch marks both vertically and horizontally. Easy peasy! 

The 4x6 photo is matted on White Daisy and then Capri. I popped it up on foam tape before adhering it to my base page. I decorated with a pink tab and some stickers from the Smitten sticker sheet (still available). Black embellishments are all from the "Circles and Patterns" bundle augmented with a few  Black Acrylic Hearts. Once those were down, I added a few dots of Robin's Egg Blue and Ballerina Liquid Pearls. I love adding these, and when they're placed close to acrylic shapes, they don't get smooshed in your scrapbook.

"Easter" was stamped in Black ink. It's from the For All Occasions set featured in the Core Catalog. That set is a must have in my book.

I don't often show my scrapbook pages because my kids don't want their babies all over social media, but I got permission for this one because you can't see her face. Soooo cute!!  Now you're off to Kristine's blog. I can't wait to see what she and our other talented Makers created to inspire us.

Until next time,
Becca
P.S. It's a boy!!

Friday, April 1, 2022

Message In a Bottle: April SOM Blog Hop


Welcome to the April Stamp of the Month blog hop featuring "Message in a Bottle." I come after Michelle's Show and Tell with Michelle blog, but don't worry if you started here. The hop is a circle, so you can start anywhere and just keep going until you get back to where started. If you get lost along the way, hop over to Melinda's blog where she'll have a complete list of all the participants.

Here's a look at this fun, versatile stamp set. 


I decided to show you how to take the In Full Bloom Cardmaking Workshop and change it up by using the images in this set. Here's what the original workshop makes (four of each design)...


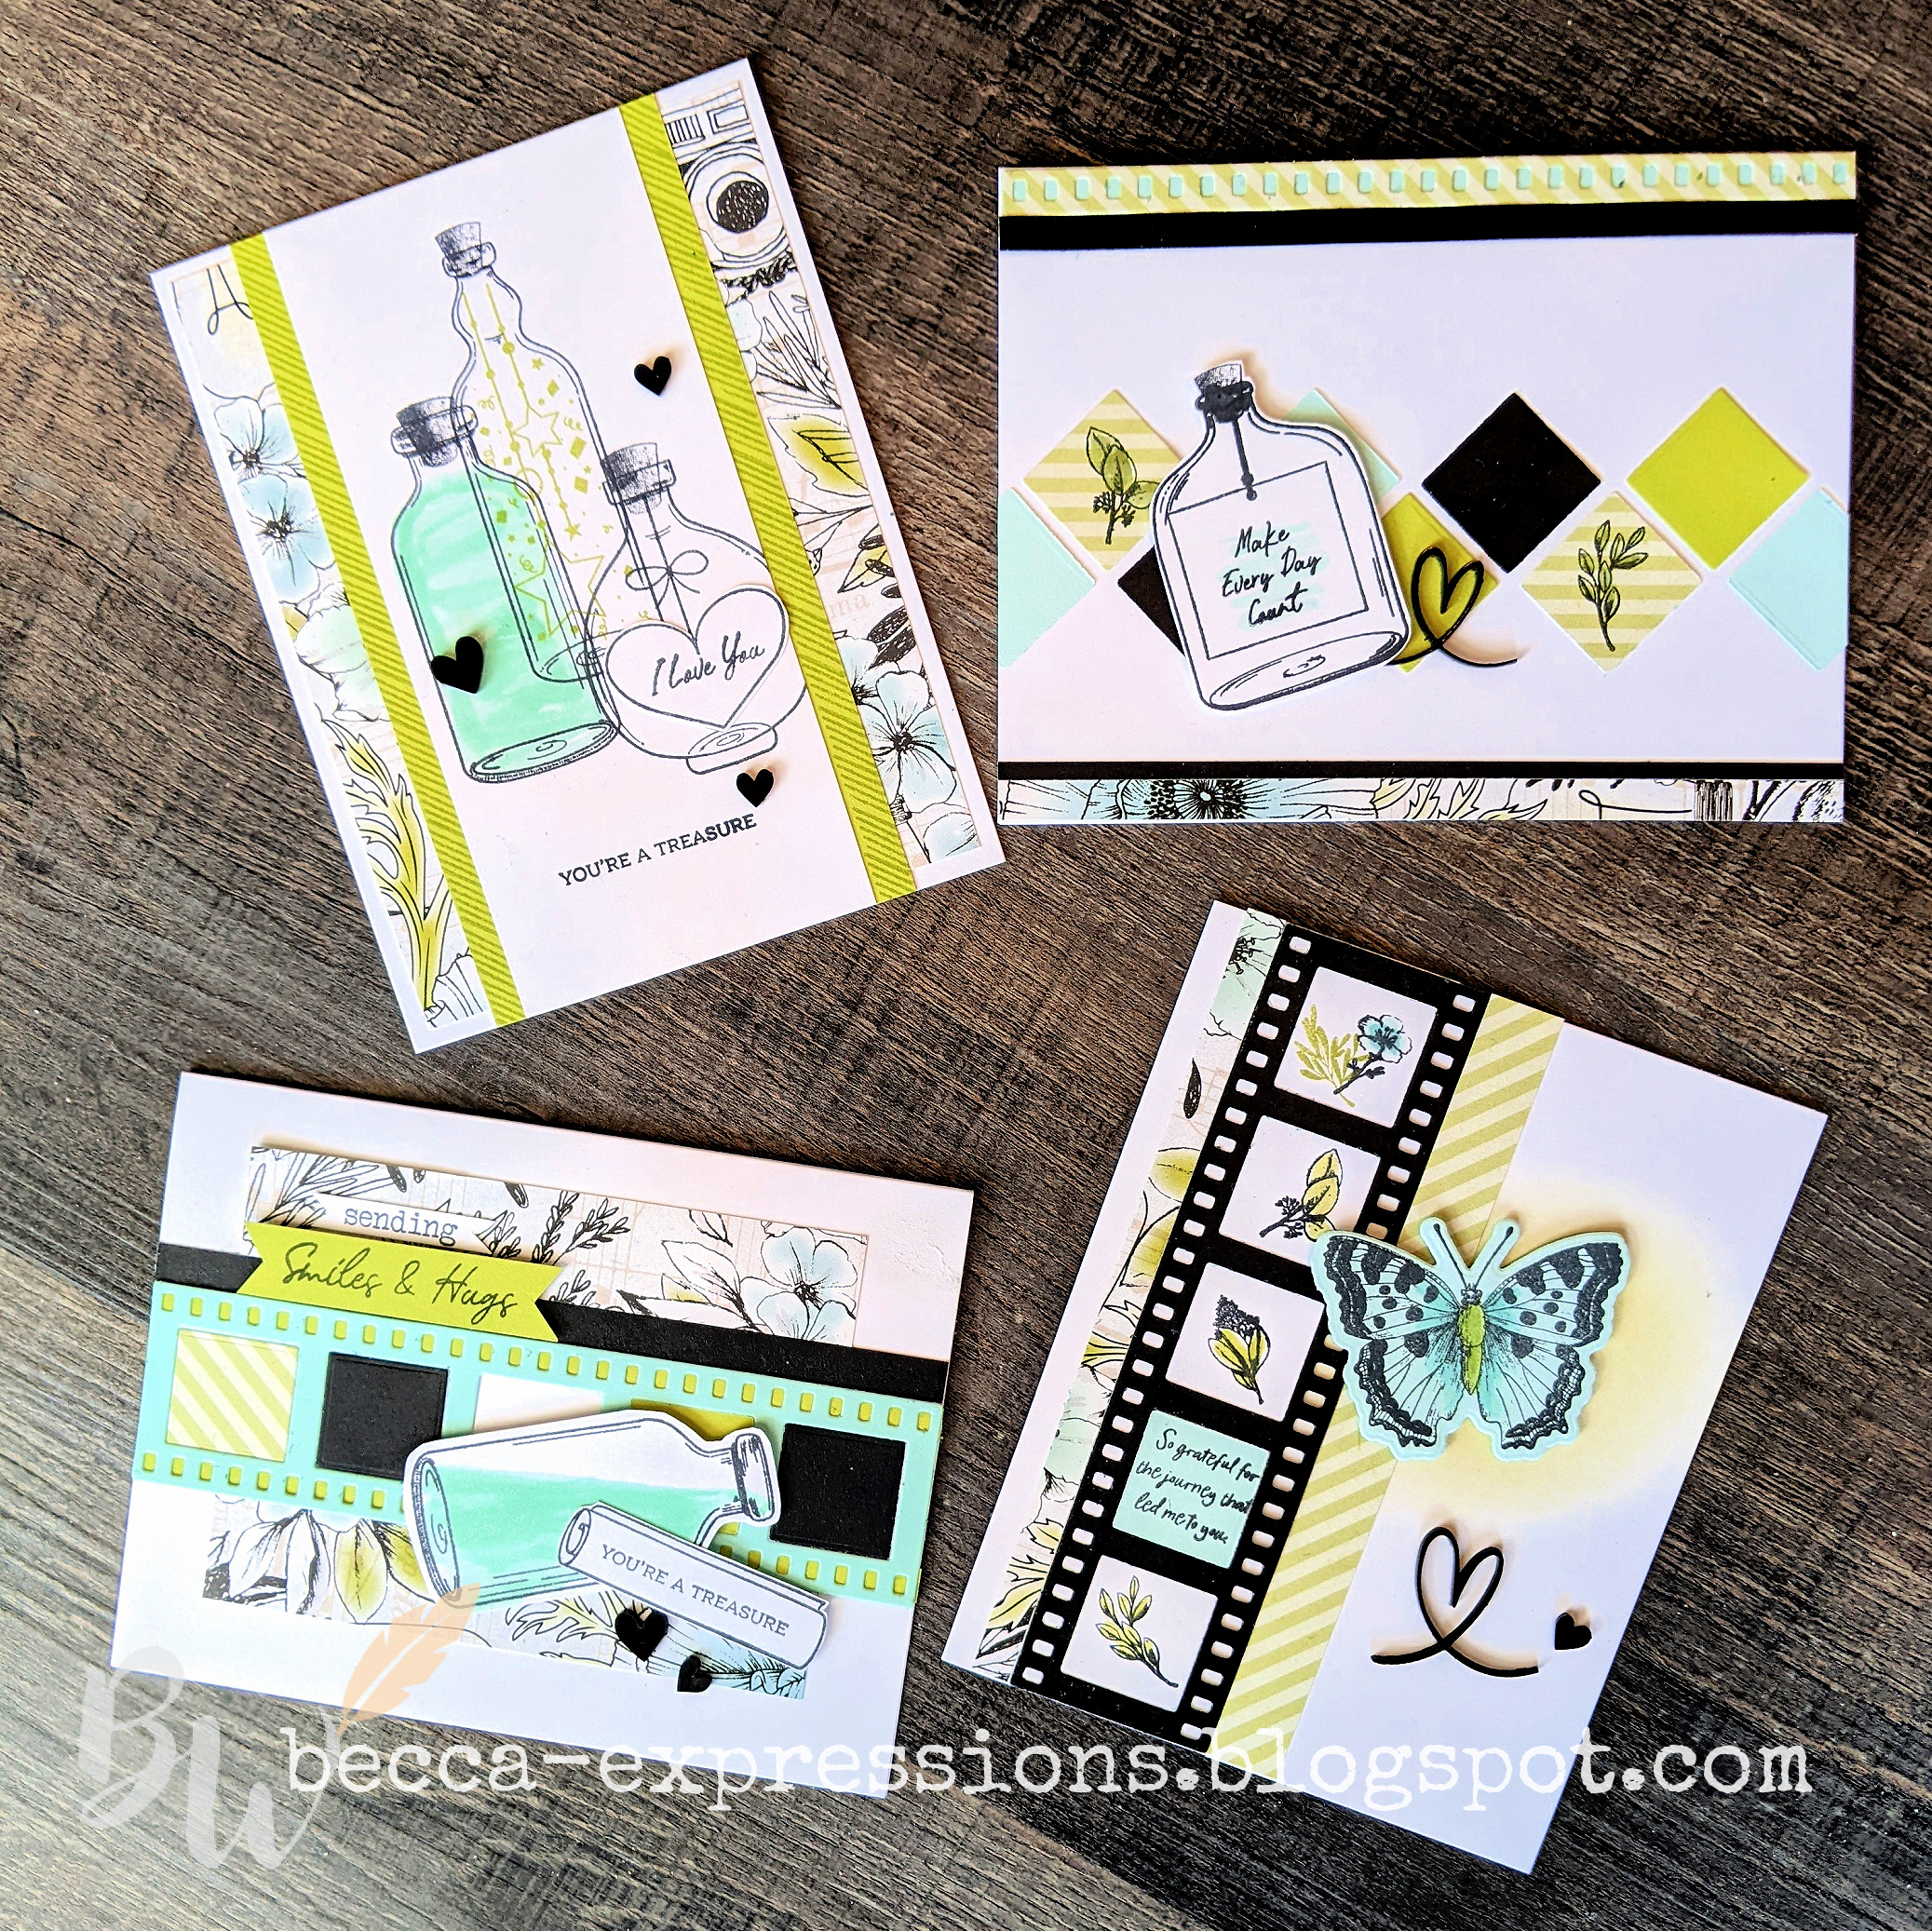
Here's how I changed it up (because, even though I really like the above images, I'd like some variety)...

It might be difficult to see the difference in the bottom right card because the only change is the sentiment inside the film strip. The original card stamps "Thanks" multiple times, so I just substituted one of the sentiments from "Message in a Bottle." 

It's not really noticeable in the above photos, but I used a Mint Shimmer Brush on all the cards except the bottom right one. It's the "water" in the two left ones and just highlights the sentiment in the top right one. On the top left one, I did stamp the heart twice, once inside the bottle and once on a separate piece of white cardstock. I cut out just the heart and layered it inside the bottle.

And then, just for fun, I decided to turn one of the bottles into a vase. I used the "In Full Bloom - Scrapbooking" set, which I featured in this blog hop post, because...well...it's GORGEOUS!


I stamped the flower and leaves in Mink ink then colored with pencils. I stamped the bottle in black. I then cut everything out by hand, although you could use the thin cuts on the flowers and leaves if you purchase the stamp set with coordinating thin cuts rather the just the stamp set like I did. The background paper is from the current Mix-in paper suite and looks like wood. The border is Black Shimmer Trim which I cut lengthwise to make it thinner.

Here's a close up on the bottle so you can see the shine I got by covering it with Liquid Glass. It's also a better look at the background texture paste I tinted with a tiny bit of Mermaid Lagoon Distress Oxide ink. The bottle is glued directly to the card base, the leaves are on a single layer of foam tape, and the flower is on a double layers of foam tape.

I love the tiny sentiments in this set. I stamped and cut it out, tucking it behind the flower and adhered directly to the leaves for some more dimension. The final touch was some Gold Twine which I tucked under the flower. 

Now you're headed to ScrappinKaty's blog. I can't wait to see what she and the other fabulously creative Makers have made to inspire us with this great stamp set. 

Until next time,
Becca

Friday, March 18, 2022

March/April 2022 Seasonal Catalog Blog Hop


Welcome to the March-April Seasonal Blog Hop. I absolutely fell in love with this catalog as soon as I opened it. I am so excited to see what everyone has for us. You should have come from Brenda's blog. But if you started here, don't worry. The hop is a circle. Just keep going until you get back where you started. If you get lost along the way, jump over to Melinda's blog for a full list of participants.

My favorite of all is the In Full Bloom-Scrapbooking set, so I made two cards for the hop. Here's the first one...


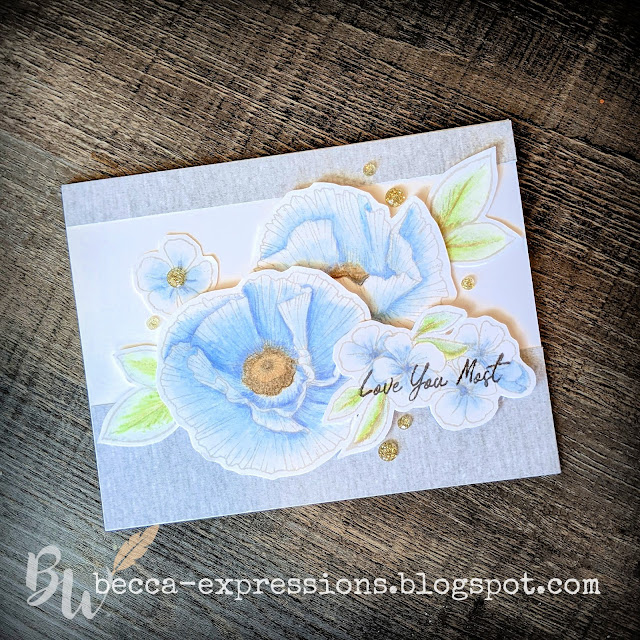
To start, I added a couple strips of Mix-in Paper to my card base. I stamped my flowers and leaves in Mink before coloring with pencils. I cut them out then layered them onto the card base, adding foam tape to some for extra depth. I stamped the sentiment - from the In Full Bloom Cardmaking Workshop - in Charcoal on the top flower before layering it onto the card. I embellished with gold glitter gems to finish off the card. 

Here's card number two...

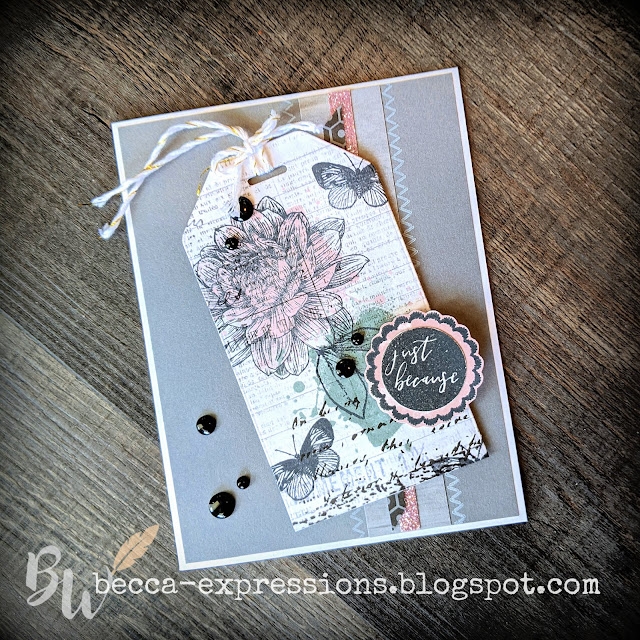
I started with Pewter cardstock layered onto a white card base. To that I added a strip of the Mix-in Paper, a smaller strip of Mulberry Glitter paper, and then I cut a zip strip from the Mix-in paper in half lengthwise and cut angles on the ends, adding it partially over the top of the glitter paper. I stamped the zigzag from Embroidered Borders in White Daisy ink along the sides of my strips before starting the tag portion.

I used Buildable Tags Thin Cuts on the newsprint pattern of the Mix-in paper. I stamped one of the "blobs" (yes that's the technical term) from Perfectly Imperfect Patterns in Mulberry and then Rosemary. Then I added the ink splatter from image in the same colors around the edges of the blob. I then overstamped the flower and leaf images from In Full Bloom in black. I accented with the butterfly image. I added ribbon to the tag before adding 3D foam tape to the back before putting it on the card base. The circle sentiment is a combination of Embroidered Circles stamped in black then overstamped with the blog from Perfectly Imperfect Patterns in Mulberry. The actual sentiment is from Spot-on Sentiments, which was introduced several catalogs ago and is still available to purchase. I hand trimmed it and the embroidered scallop, layered one on top of the other, then added it to the tag with more foam tape. Black dots were the final touch. 

Now you're off to CatScrapbooking's blog to see what she's made for us. I'm right behind you!

Until next time,
Becca

Tuesday, March 1, 2022

March Stamp of the Month Blog Hop


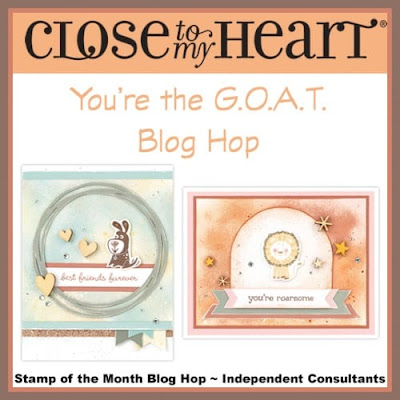
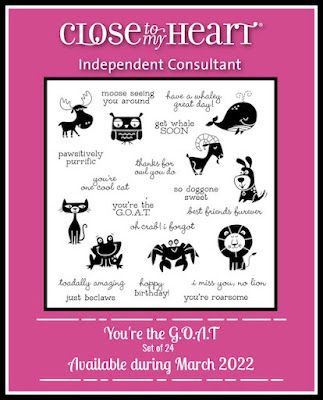
Welcome to the March Stamp of the Month Blog Hop featuring "You're the G.O.A.T." Now, if you're not up on all the terminology, you might need someone to explain that abbreviation--like I did. GOAT stands for Greatest of All Time. You should have come from the fabulous Katy Taylor's ScrappinKaty blog. The hop is a circle, so keep going until you get back to where you started. Head over to Melinda's blog if you get lost along the way. Here's a close up look at this adorable stamp set.

I am still recovering from my heel spur surgery and working with limited supplies. I haven't been down to my craft room for almost TWO MONTHS! **Sigh** But I grabbed the same Card Front Stencil Pack I used for last month's blog hop to create two, new cards.


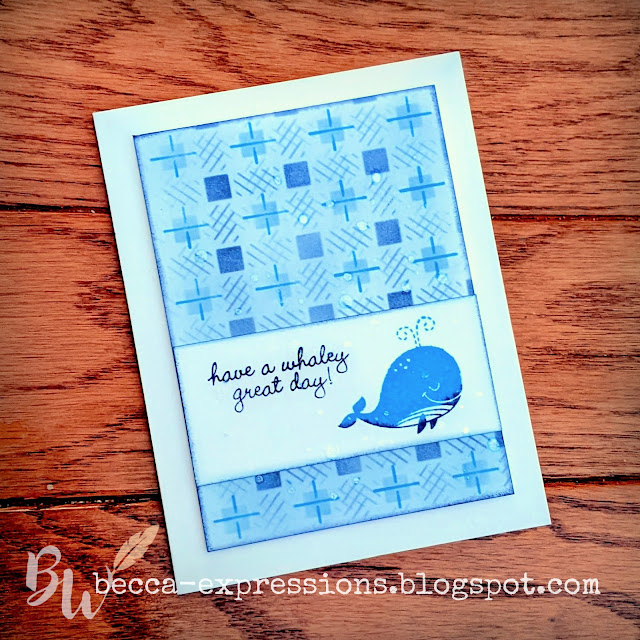
This one uses Capri, Sapphire, and Lagoon inks for the background. The whale was stamped in Capri and rolled in Sapphire. To finish off, I sponged the edges in Sapphire as well as added some clear shimmer brush splatters before adding it to my card base.


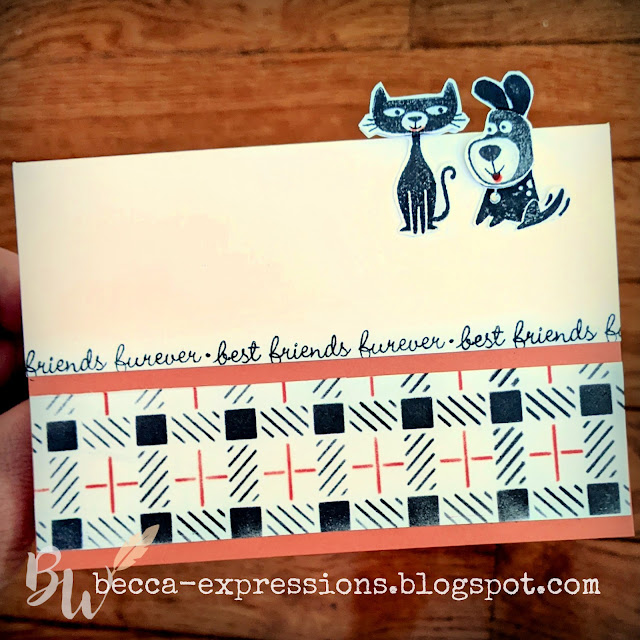
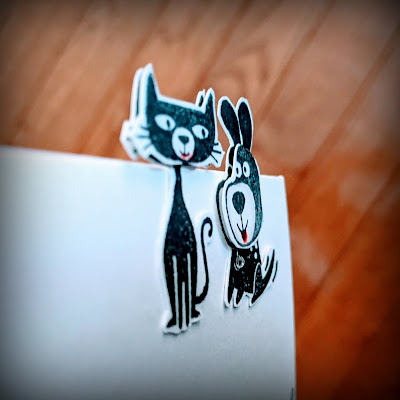
For this card, I used Candy Apple and Black inks for the stenciled pattern with Papaya cardstock borders. I stamped the cat and dog in black twice, cut them out, and then added them to the card base which I cut down to accommodate the off-the-edge images. I made sure that the entire card would still fit inside a standard size envelope. 

After I mounted the first layer of the cat and dog, I cut out the faces from the second set of images I'd stamped and used foam mounting tape to lift them.

The final accents were some red colored pencil on the lips and a bitty sparkle on the dog's collar. 


Now you're off to the amazing Kim's blog. I'm hopping right behind you because I can't wait to see what all our wonderful Makers have made to inspire us.

Until next time,
Becca

Tuesday, February 1, 2022

February SOM Blog Hop: Here's the Story


Welcome to the February Stamp of the Month Blog Hop featuring "Here's the Story." 

You should have come from Kim's blog but don't worry if you started here. The hop is a circle, so keep going until you get back to where you started. If you get lost, head over to Melinda's blog for a full list of participants. 

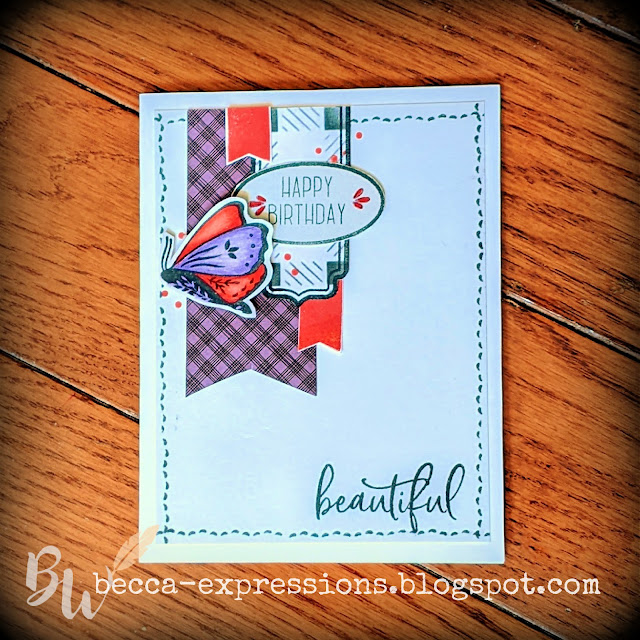
While this set is geared toward scrapbooking, I wanted to twist it up for a card. Please excuse the photography on my dirty floor. I had heel spur surgery a few weeks ago, so I'm not able to get downstairs to my craft room with my good camera... or hold a broom while trying to steer a scooter.

Here's my card:


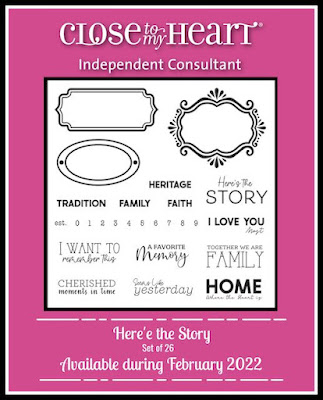
I have a limited number of craft supplies sprawled over my dining room table, so I had to make due with what was already upstairs. I started by swiping Grape ink over Jingle Joy paper (still available in the Online Only section of my website). I then stamped two of the labels from Here's the Story. The longer one I sponged with Black ink through the plaid pattern of Card Front Stencil Pack 3 then turned sideways and cut off one end to create a banner. I stamped the oval label and trimmed out the center. I then pulled out the Sawyer Cardmaking Workshop to decorate. I hand cut the butterfly because I don't have my die cutting machine upstairs. Which also means that, instead of running my Linen base piece through the Stitched Rectangle Frame like I normally do, I had to improvise. I used a stamp from the Sawyer workshop to created a border by stamping it multiple times in Black ink. 

All my coloring was done with pencils because (and you're going to get tired of hearing this by the time my post is done) that's all I have upstairs.

I don't have Candy Apple paper upstairs, so I stamped a banner from the stamp set included with the most recent Album Retreat, but you can easily created a banner with just cardstock.

Once all my pieces were done, I layered them on my card base. I only used foam tape on the butterfly. Everything else was adhered directly. I then added tiny dots in Candy Apple ink. That dot and both sentiments are also part of the Sawyer Card Workshop set.

Now you're off to Krista's Crafty Blog. I can't wait to see what she and all the other talented Makers have to inspire us with this fun set.

Until next time,
Becca

Tuesday, January 18, 2022

Jan-Feb 2022 New Products Blog Hop


Welcome to the New Products Blog Hop featuring items from the Jan-Feb Seasonal Catalog. You probably came from Darlys' blog. But if you started here, that's fine. The hop is a circle so keep going until you get back where you started. If you get lost along the way, head to Melinda's blog for a complete list of participants.

I have three different cards using three different sets of products for you because--frankly--I just couldn't choose among them. So many great things in this catalog!

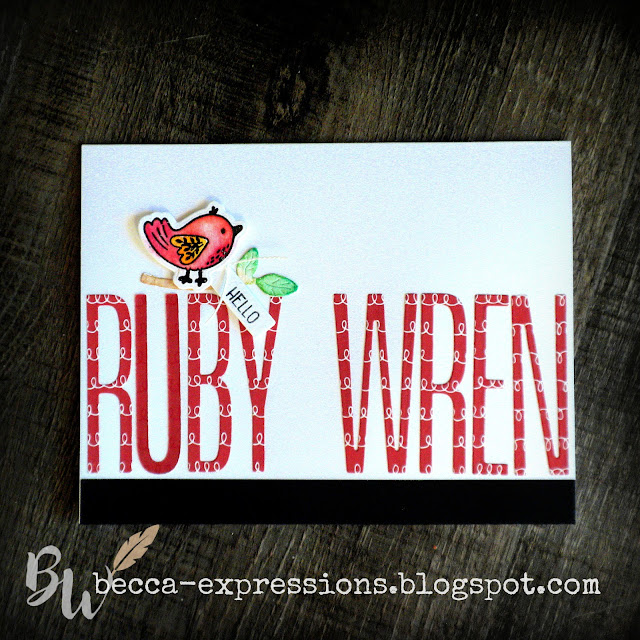
My first card features the Sawyer Cardmaking Workshop (new) plus Slim Line Alpha Thin Cuts (Core Catalog).


My nephew and his wife just had a baby. They have two girls and have given each a "bird" middle names, so I knew exactly what I wanted to do to welcome Little Miss Ruby Wren. The cardstock used on the letters is retired, but that part is so easily replaced with different cardstock that I decided to include it in this hop anyway. 

The bird and branch were done on watercolor paper. I used Black Detail Embossing Powder for the bird. I then watercolored, using the barrier created by the plastic embossing to keep colors in place. On the branch, I just let the brown of the branch and green of the leaves bleed into one another. The tiny little tag and hello were done on regular White Daisy Cardstock. To ground the card, I added a half-inch wide border of plain Black Cardstock.

I sent this picture to my sister. She cropped it and put it on her Skylight because she loved it so much.

Here's card #2...


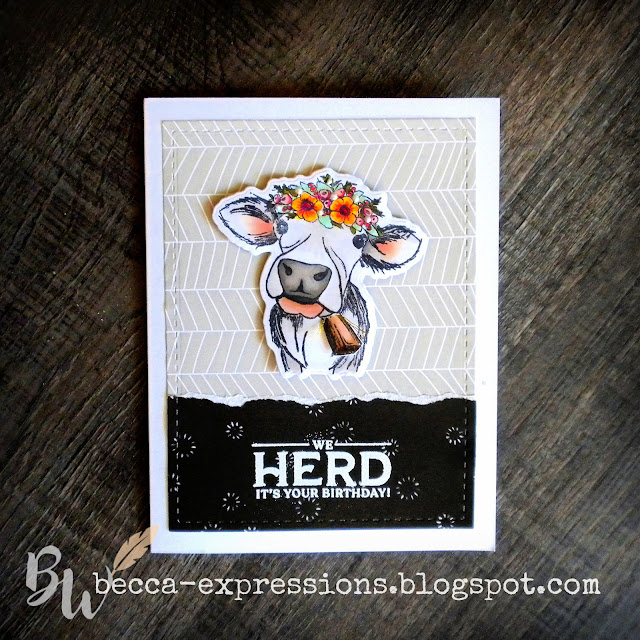
This "Udderly Wonderful" stamp set was the very first thing in my cart. It's different than anything else I have, and I love the punny sentiments. I used two papers from the current Mix-In Paper, tore the edge of the black one and layered it on top of the gray one. I then ran both through my die cutting machine using the Stitched Rectangle Frames. I embossed the sentiment in White Detail Embossing Powder. The cow was stamped in black ink and then colored with alcohol markers to get some blend. I used the coordinating thin cuts to cut out the cow head. I stamped and colored the bell then cut it out using my Microtip scissors to eliminate the white border that would have been around it had I used the coordinating thin cut. I then created a small slit under the cows chin with an x-acto knife and inserted the bell. I used foam tape to secure the bell on the underside. I added more foam tape around the edges of the cow head and added it to my card. I tied a knot of Gold Embellishing Thread and tucked it into the slit, securing it with a dot of Liquid Glass. It doesn't show up well in the picture, but it gives just a little something, something in real life.

My final card features Build-a-Flower (new) and the For All Occasions stamp set (Core Catalog).  But it also features one more stamp set from the Jan-Feb Seasonal Catalog. Can you spot it?


That bottom border is the light side of Flamingo Cardstock stamped with the new Barn Door stamp set in Flamingo ink. I LOVE that I now have the ability to create woodgrain in any color I want! My colors here are Raspberry, Flamingo, Caroline, Bluebird, Lemonade, Sundance, and Nectarine on the flowers. I want to point out that I used Lemonade and Sundance on the large yellow flower at the top of the cluster. The center of the blue flower is Lemonade overstamped with the smaller center in Nectarine. Using Nectarine over Lemonade made the Nectarine fade a bit, making it identical to Sundance stamped straight on white as shown at the top of the big yellow flower. I hope that makes sense. The leaves are Clover (outline) and Green Apple (centers) with Evergreen vines. My sentiment is Sapphire. (NOTE: Please click here to see another fun way I've used this Build-a-Flower stamp set for a previous blog hop.)

The drawback of solid image stamp sets like this is that you need lots of ink colors. The benefit is that, if you already have those colors, you can do amazing things in a very short amount of time. I stamped the vines directly on my card base. Everything else was stamped on White Daisy, cut out, and then layered either by gluing directly to the cardbase or using foam tape. The final touch was adding dots of Sage Liquid Pearls. 

I made five more of these, leaving off the sentiment, so I can add whatever I need for any occasion.

Well, that's it for me. Now you're headed to Megan@Crop Craft Create. I can't wait to see what we she and the rest of our talented Makers have created to inspire us. 

Until next time,
Becca

Saturday, January 8, 2022

Smitten Blog Hop


Welcome to this special blog hop featuring the Smitten promotional items. This is such an adorable Valentine themed set! I can't wait to see what all our talented Makers have created. You should have come from Gina's blog, but don't worry if you started here. The hop is a circle, so just keep going until you get back to where you started. You can always head to Melinda's blog for a full list of participants if you get lost along the way.

Here are my cards:


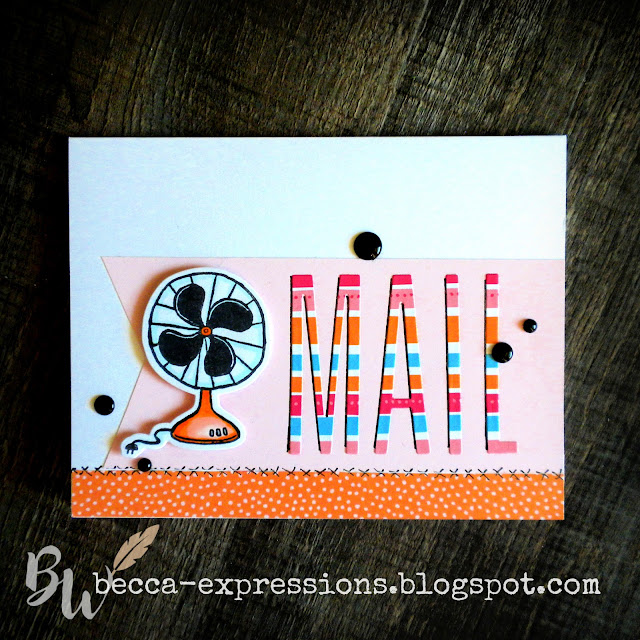
For this card, I combined the fan image with the Slim Alpha Thin Cuts. To give them just a little more oomph against the Ballerina background paper, I outlined parts of the letters with a Black Journaling Pen. LOVE how this turned out. 

For these next two cards, I added images from the Build-a-Flower set which just released January 1.


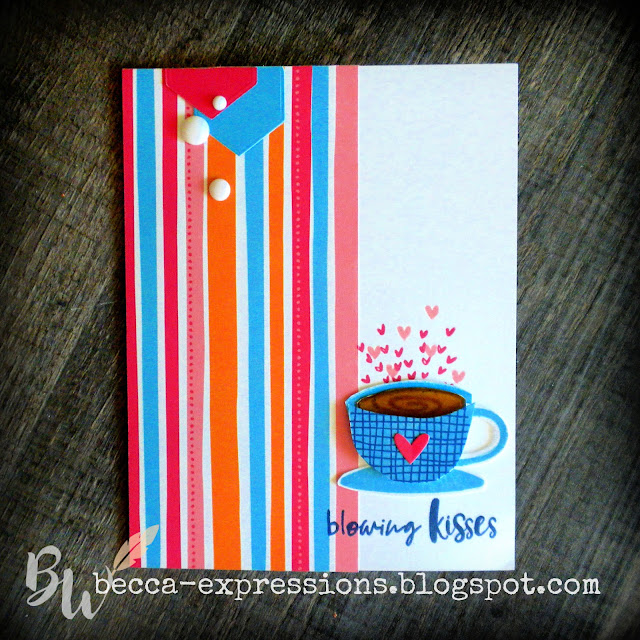
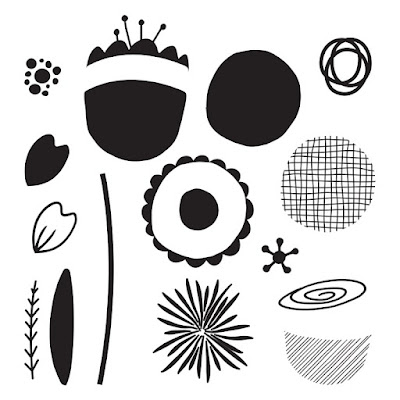
The paper, hearts, sentiment, and sticker on the cup all come from the Smitten collection. The cup was made using parts of Build-a-Flower. Here's a look at this set so you can see how I did it.

The only altering of an image I did was to curl the stem image (Don't you just love that we can bend images?) into a C shape for the cup handle. I cut everything out, layered it up with foam tape, and added some Liquid Glass over the coffee part to give it shine.


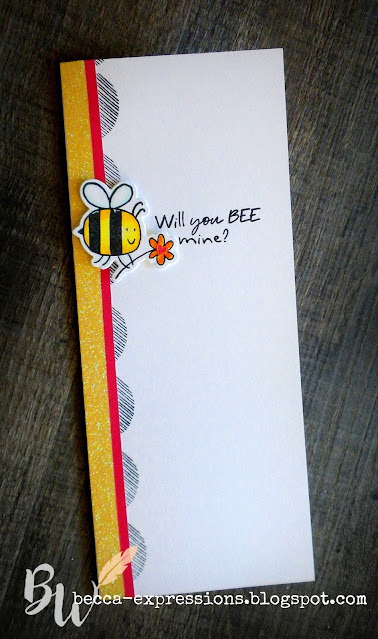
This one used none of the Smitten paper because I like to show how you can still use the stamps once the coordinating paper is gone. Note that scallop border. It comes from Build-a-Flower.


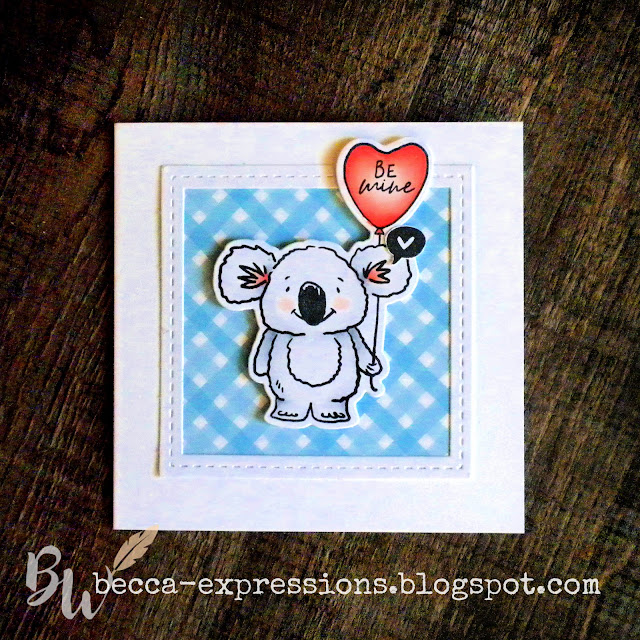
This final card uses just the image and paper from Smitten along with the middle sized die from Stitched Square Thin Cuts. This Capri colored gingham paper is so fabulous. I wish I could get about twenty sheets of it. 

This special set can be found under the "Promotions" tab on my website. It runs through the end of February or while supplies last.

Now you're off to CatScrapbooking. I can't wait to be inspired by her and the rest of our blog hop participants!

Until next time,
Becca